

This post explains how to integrate Google Maps in an app. The app is a Xamarin Forms application. Xamarin is a cross platform for Android and iOS. The programming language is C#. In addition to this post, there will be a post, which describes how to replace the standard Google Map pin with a custom icon.
List of components
- Visual Studio (free)
Downloading the NuGet Package
Open Visual Studio and choose Mobile App (Xamarin.Forms). In order to use Google Maps, we have to integrate the corresponding NuGet package. Instead of the official version “Xamarin.Forms.Maps” by Microsoft, we use “Xamarin.Forms.GoogleMaps” by amay077. Please remember to install the NuGet package for each project. The “Xamarin.Forms.GoogleMaps” NuGet package by amay077 contains all functions of the official package and some additional ones. Among other things, you can easily replace the markers on the map with your own pictures.
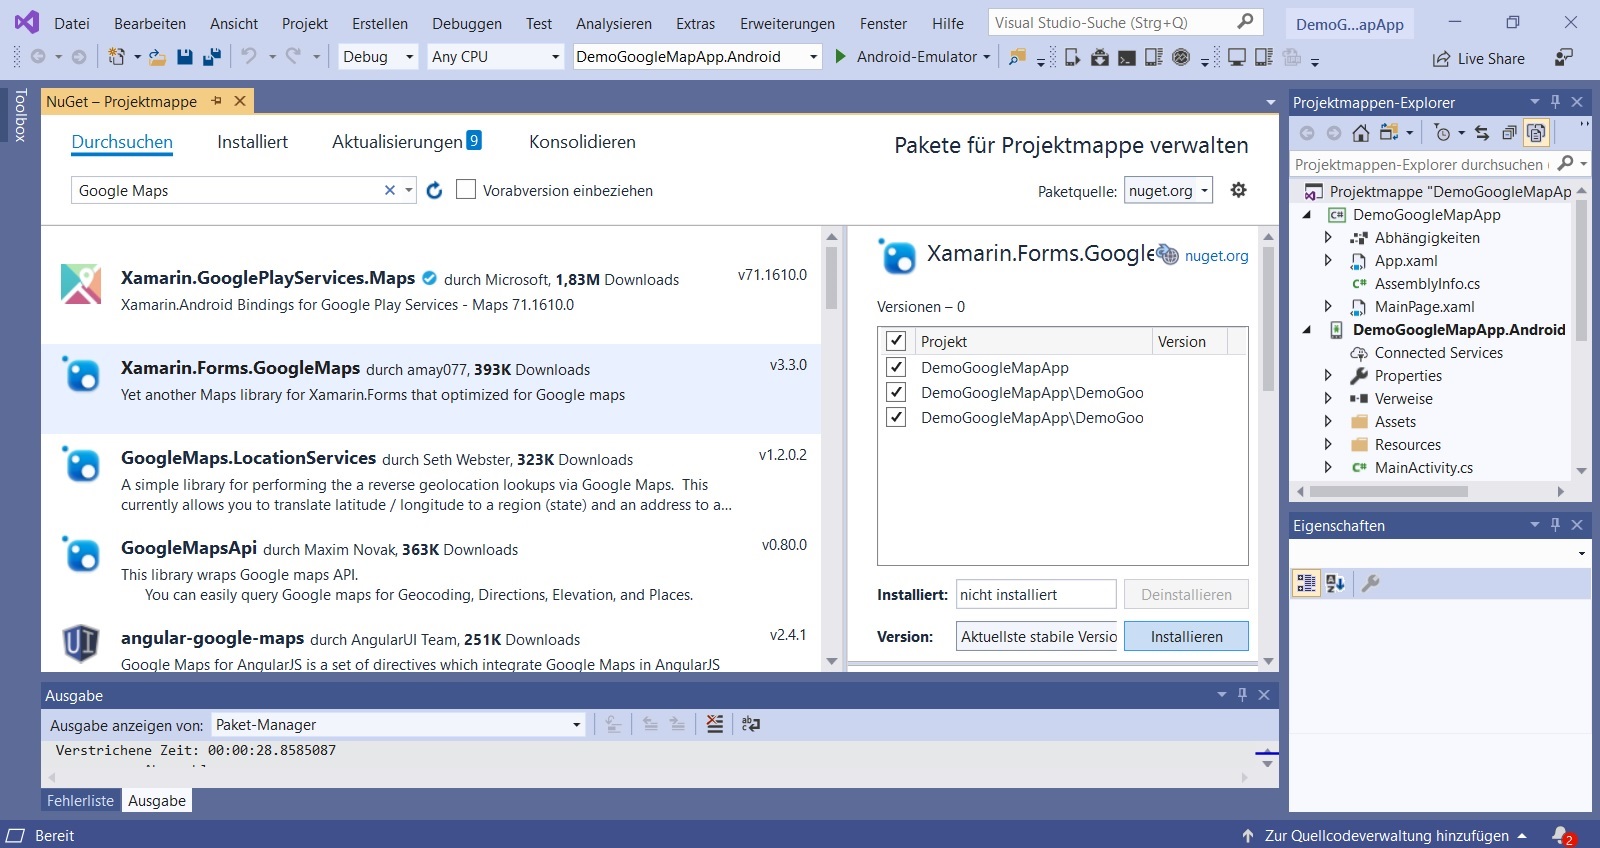
All possible functions of the “Xamarin.Forms.GoogleMaps” NuGet package by amay077, to integrate Google Maps in an app, are described on GitHub: https://github.com/amay077/Xamarin.Forms.GoogleMaps
XAML code for the Google Map integration
Since the NuGet package is already installed, Google Maps can now be added to the XAML page. Open “MainPage.xaml” and add:
xmlns: gmaps = "clr-namespace: Xamarin.Forms.GoogleMaps; assembly = Xamarin.Forms.GoogleMaps"
Then we need the following XAML code to display the map:
    <Grid>
        <gmaps:Map x:Name="MyMap" MapType="Street" HasZoomEnabled="True" MyLocationEnabled="True" >
            <gmaps:Map.ItemTemplate>
                <DataTemplate>
                    <gmaps:Pin Icon="{Binding PinIcon}" Position="{Binding Position}"
                              Label="{Binding PinLabel}" />
                </DataTemplate>
            </gmaps:Map.ItemTemplate>
        </gmaps:Map>
    </Grid>

Get the Google API Key to integrate Google Maps in an app
Although we have the XAML code to integrate Google Maps in an app, an API key is required. Otherwise we won’t see anything. Obtaining the API key from Google is easy and quick.
Simply request the API key here: https://developers.google.com/maps/documentation/embed/get-api-key
Please note that the keys for iOS and Android are different.
Initialize Google Maps for Android
These are the final steps to display Google Maps in Android. Open the “MainActivity.cs” and add the following line in the “OnCreate ()” function:
Xamarin.FormsGoogleMaps.Init (this, savedInstanceState);

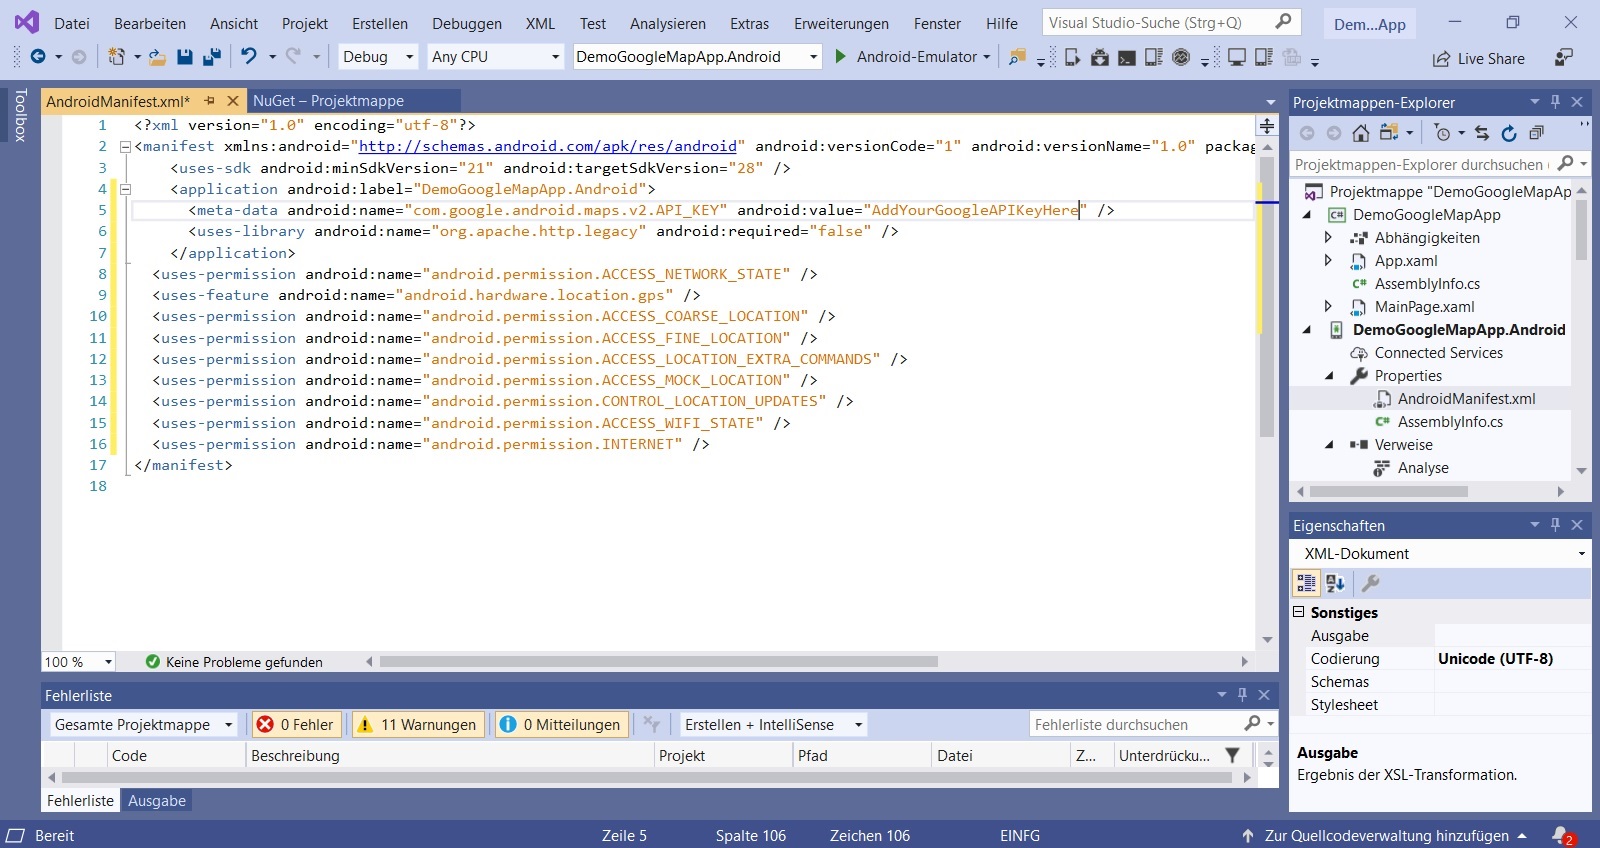
Next, go to “Properties” and select “AndroidManifest.xml”. We have to insert here the Google API key and grant the rights for GPS.
The is the place where you have to put the line with the meta-data for the Google Maps API Key:
<application android: label "Name of your app">Add here the meta-data</application>
This is the line with the meta-data for the Google Maps API Key:
<meta-data android: name = "com.google.android.maps.v2.API_KEY" android: value = "AddYourAndroidAPIKeyHere" />
Then the rights for the GPS have to be granted:
<uses-permission android:name="android.permission.ACCESS_NETWORK_STATE" />
<uses-feature android:name="android.hardware.location.gps" />
<uses-permission android:name="android.permission.ACCESS_COARSE_LOCATION" />
<uses-permission android:name="android.permission.ACCESS_FINE_LOCATION" />
<uses-permission android:name="android.permission.ACCESS_LOCATION_EXTRA_COMMANDS" />
<uses-permission android:name="android.permission.ACCESS_MOCK_LOCATION" />
<uses-permission android:name="android.permission.CONTROL_LOCATION_UPDATES" />
<uses-permission android:name="android.permission.ACCESS_WIFI_STATE" />
<uses-permission android:name="android.permission.INTERNET" />
Afterwards the “AndroidManifest.xml” looks like the screenshot here:
Initialize Google Maps for iOS
The initialization is easier for iOS. You just have to open the “AppDelegate.cs” and add the following line:
Xamarin.FormsGoogleMaps.Init ("AddYouriOSAPIKeyHere");
Start the app
The app is now ready to go. Press compile in Visual Studio, then it looks like this:

It is normal that the app chooses Rome as starting point. The next post shows how you can implement the starting point of the Google Maps app.
Sometimes it happens that the app does not automatically ask for the required rights and therefore it closes immediately after launching. This can be avoided by simply allowing GPS access in the settings or implementing a command to ask for the required rights.
Download files
Please don’t forget to insert your Google Maps API Key in the source code.


I’m amazed, I have to admit. Seldom do I encounter a blog that’s both equally educative and engaging, and without a doubt, you have hit the nail on the head.
Thanks for sharing! You must continue your writing. I am sure, you’ve a huge readers’ base already!
Thank you for another informative web site! Where else could I get that kind of information written in such an ideal way? I’ve a project that I’m currently working on, and I have been so long on the look for this info!
Is it okay if I show your entry on Facebook?
Hi sir,
please can you help me to make a google place autocompletion with xamarin?
Hello, I am looking for new ideas to improve my own website! Can I copy your topics?
Wow, this was easier to follow, then I expected! Thanks for your post. 🙂
Clear instructions and easy to follow, thank you very much!
Great article, just what I was looking for.