

There are often huge round magnets in different colors for magnetic boards, but unfortunately they usually don’t hold properly. That’s why I ordered so-called super magnets made of neodymium. They hold really well, but are difficult to remove again. This gave me the idea to construct a magnetic clamp with which the neodymium magnets can be easily detached.
This might also be interesting for you: How to construct a display casing?

List of components:
- 4 x magnet 2x10x30 neodymium nickel plated N42
- 2 x dowel pin dia 4×24
Concept for the development of the magnetic clamp:
- Parts from 3D printer
- Inexpensive neodymium magnets
- Simple to use technology
- No round shape
- Stable and light construction
Implementation of the magnetic angle with 100 mm
STL files are required for the parts from the 3D printer. These can be generated by a CAD program. As always, I use Solidworks as CAD for designing.
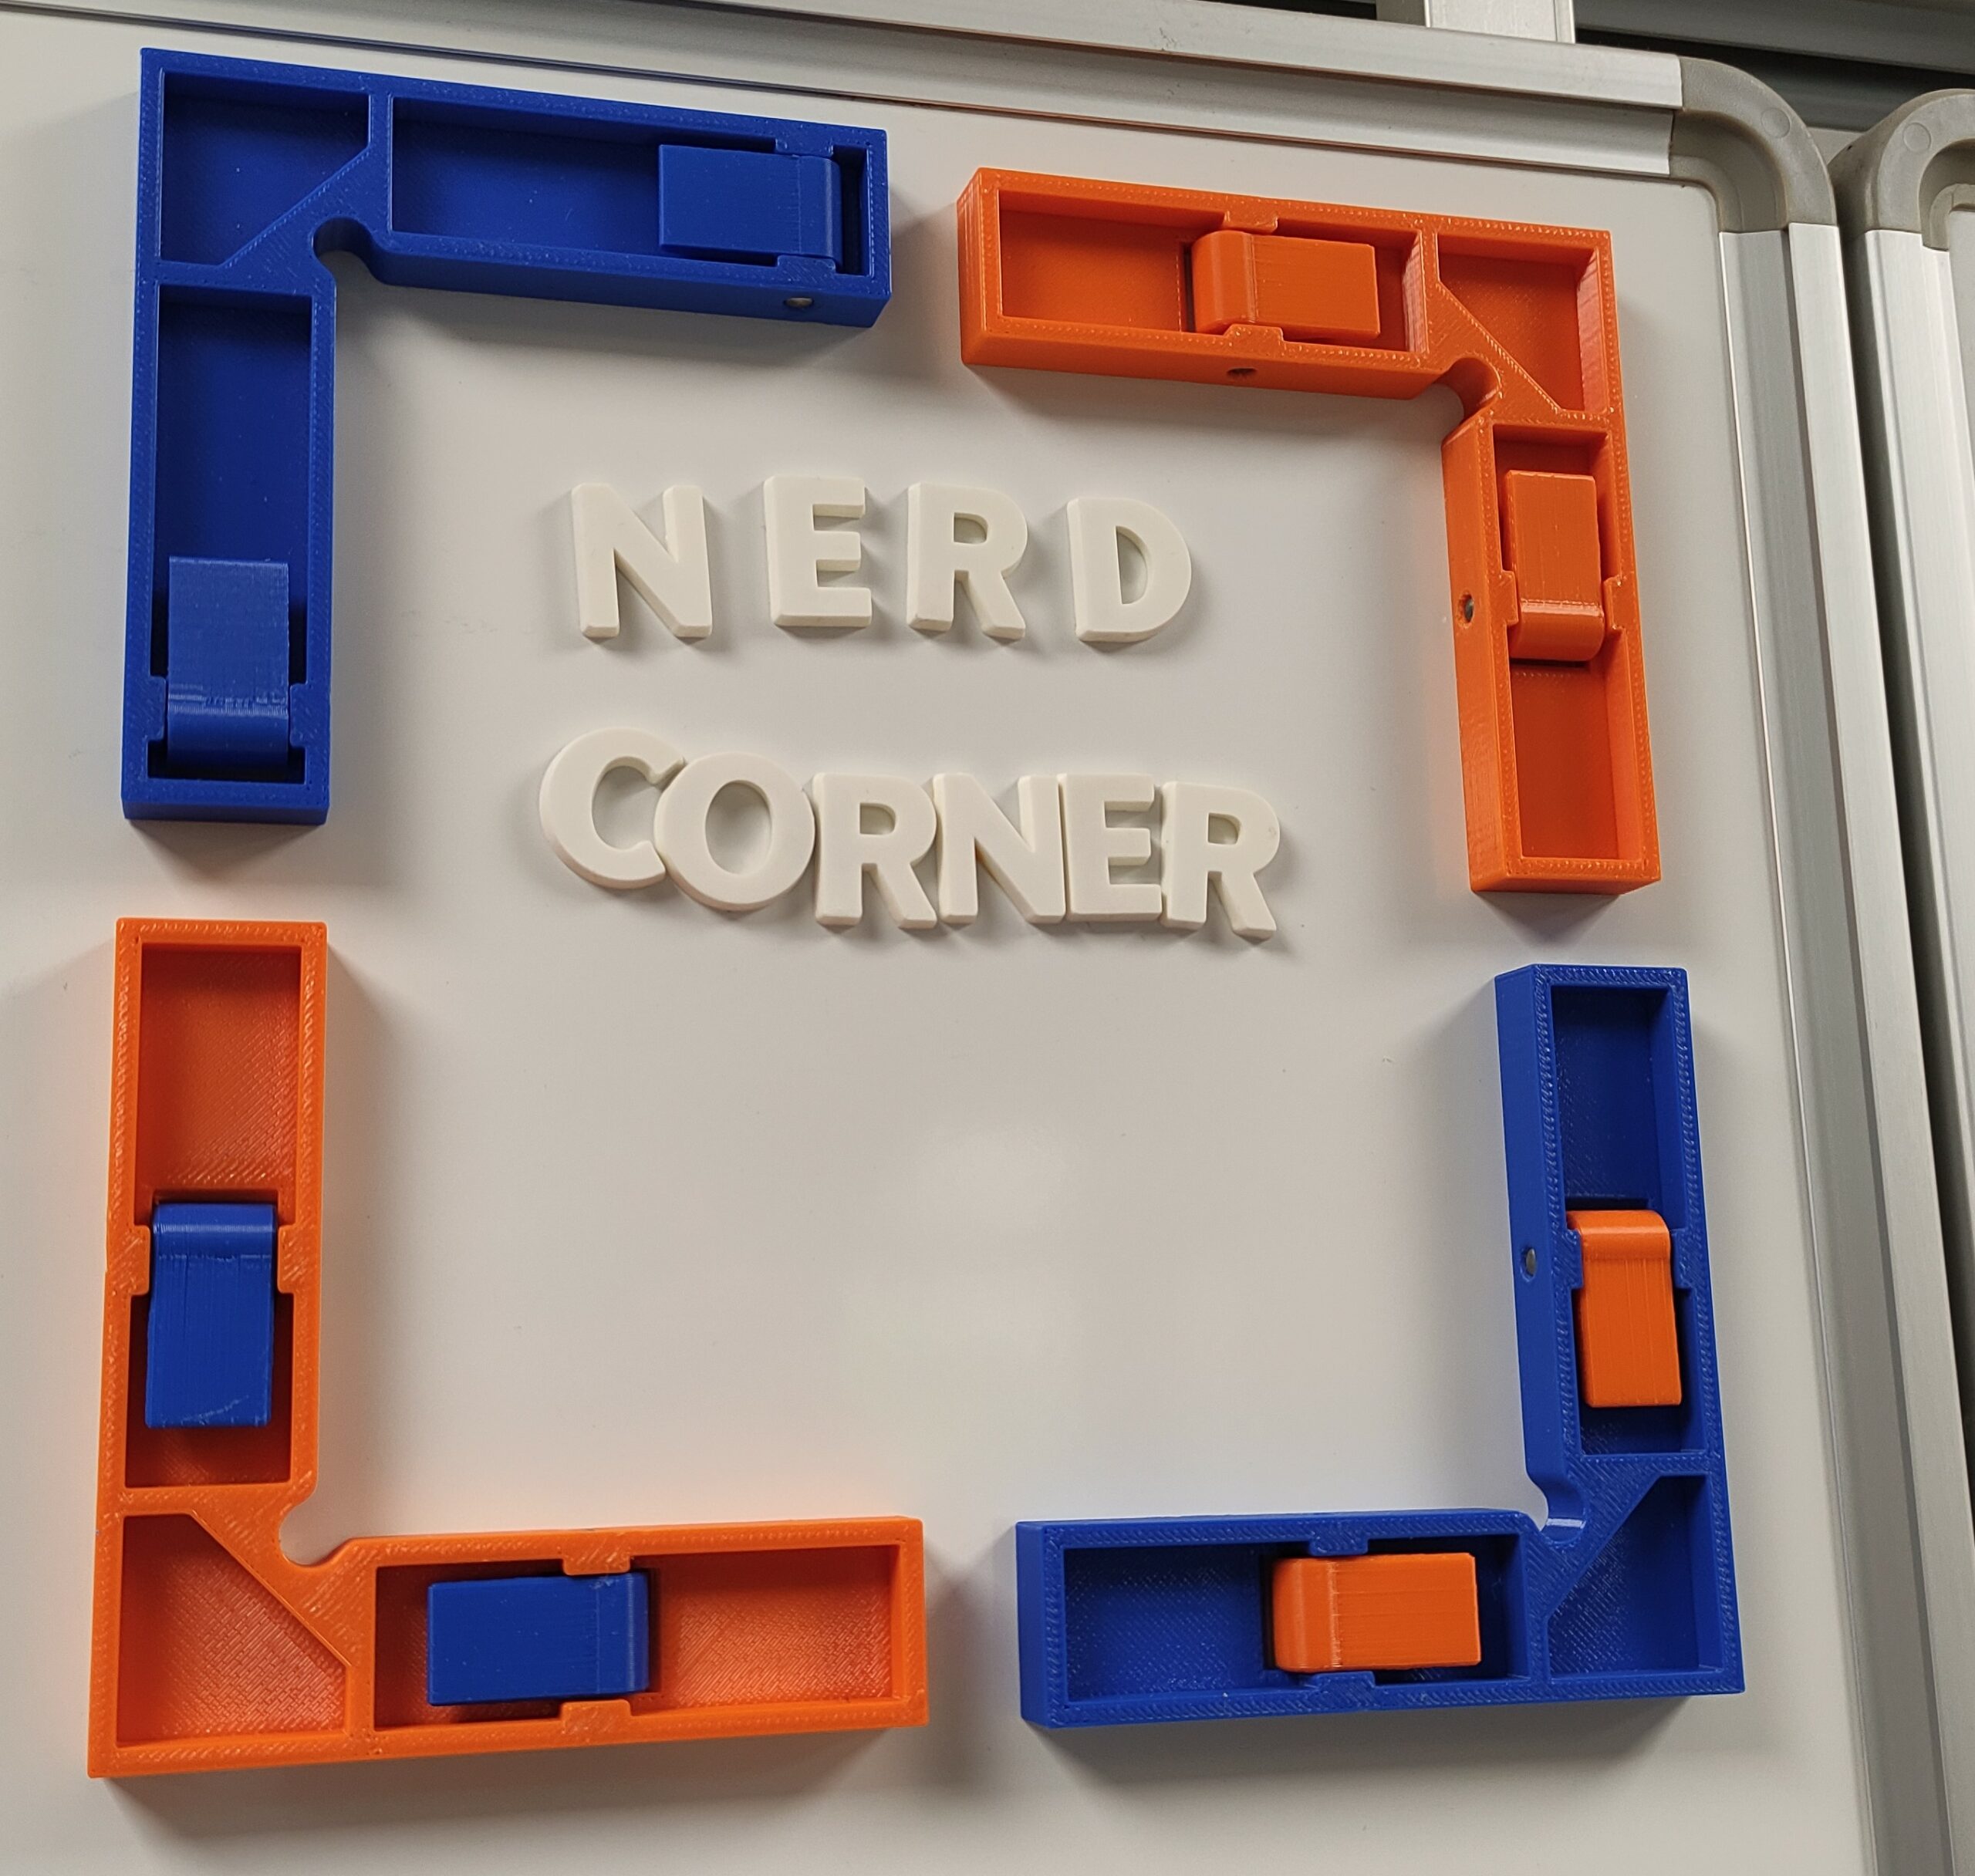
The idea was to construct an angle similar to the one that is used as a support or holder when welding. For the magnetic board, of course, magnets are needed. I chose square magnets made of neodymium nickel-plated with dimensions 2 x 10 x 30 mm.
The magnet strength is “N42” and is neither too weak nor too strong. The value “N42” describes the energy density of the neodymium magnet and is mostly divided into N35 to N54.
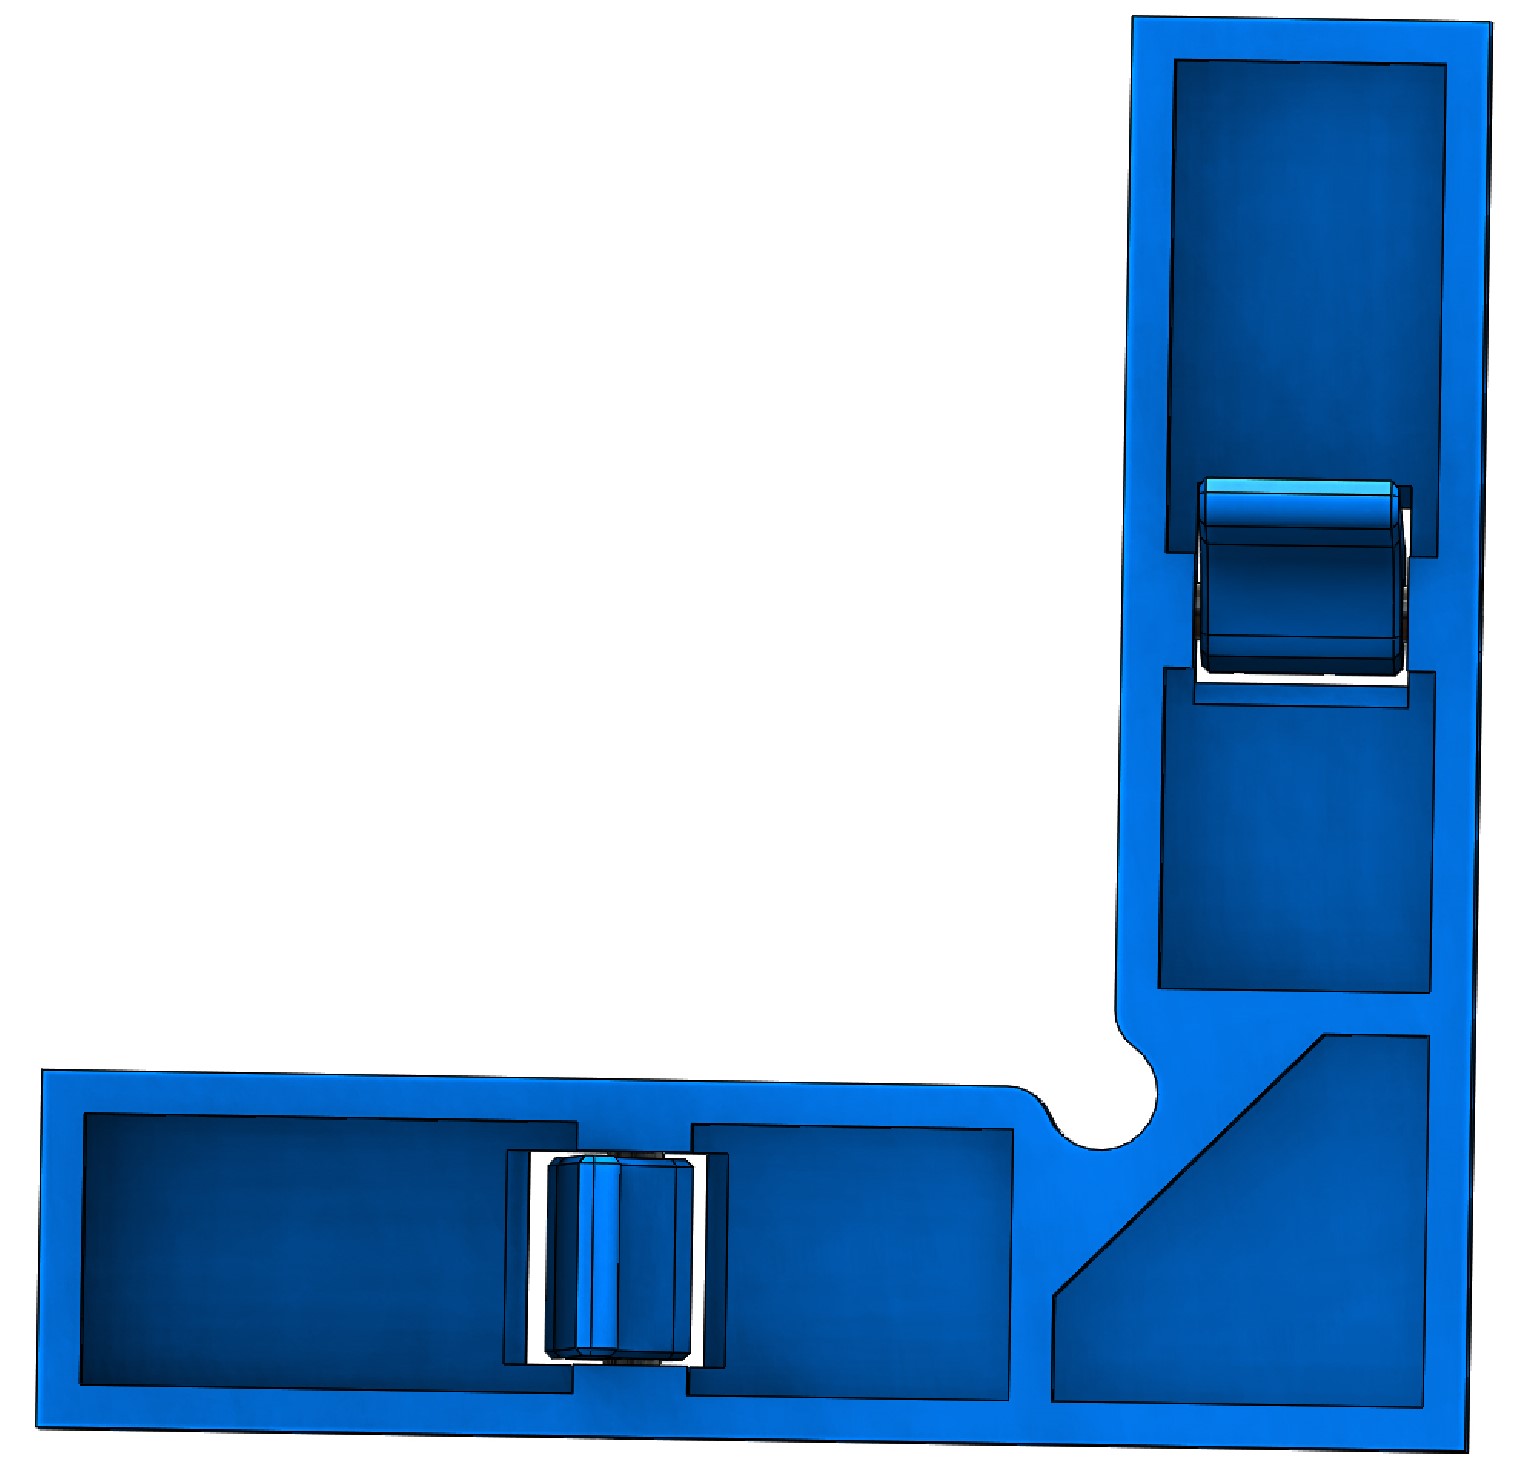
The higher the number, the stronger the magnet. The nickel coating serves as protection against corrosion. The dimensions of the magnet determine the dimensions at the angle. For simplicity, this was constructed isosceles. A segment with a length of 100 mm and a width of 25 mm should not be a challenge for a small 3D printer.
To improve stability and torsional rigidity, I have constructed 10 mm high walls with a thickness of 3 mm. The magnets are recessed at the bottom with recesses. It should be noted that an oversize of 0.15 mm was planned for the recesses so that the glue has enough space to stick the magnets. A high-quality adhesive should be used if you want to enjoy the magnetic angle for a long time.
To remove the angle from the board, different variants would have been conceivable. One possibility would be a screw that presses the angle from the magnetic board when turning. The advantage would have been that only one thread would have had to be constructed in the angle. The disadvantage would have been that a screw without protection would damage the surface of the board and, in addition, many turns would have been necessary. A better solution was therefore a so-called excenter to be able to loosen the angle without much effort.
A few points had to be taken into account. The excenter could not be placed just anywhere, but had to be attached as close as possible to the magnet. The increase when actuating the excenter should be exponential, since the magnet loses strength with increasing distance. This means that in order to keep the lever length of the eccentric as short as possible, the distance between the magnets and the board was first increased only minimally and then more and more quickly. The fully opened eccentric has 3 mm. With this value, the angle can be easily removed from the board.
One excenter was fixed between the magnets for each leg. A non-hardened dowel pin with a diameter of 4 mm was used for the rotary axis of the eccentric. Alternatively, an M4 screw can be used, but it must be fixed with a nut.
The parts were printed, assembled, glued, and could then be tested. The result was more than satisfactory on various panels and steel sheets. The holding forces are excellent, but it should be fairly mentioned that the angles sometimes slip slightly. Therefore, an anti-slip tape was glued on some angles.
Please note when using the magnetic clamp:
- Attachment only with the open excenter
- Holding force depends mainly on the quality of the magnetic board
- Neodymium magnets are not toys (risk of injury!)
- Use good quality glue


One thought on “Magnetic clamp for strong neodym magnets”