

Together with the STC 3008, the STC 1000 and the STC 3028, the STC 3000 is one of the most popular temperature sensors with automatic relays. The hardware costs less than $ 10 and is particularly suitable for hobbyists. The usage ranges from freezers to stand alone PCs to aquariums. The device is actually easy to use if you know how. But the Google search does not return a single hit for a user manual. We have therefore documented here how to operate the STC 3000.
Power supply and wiring

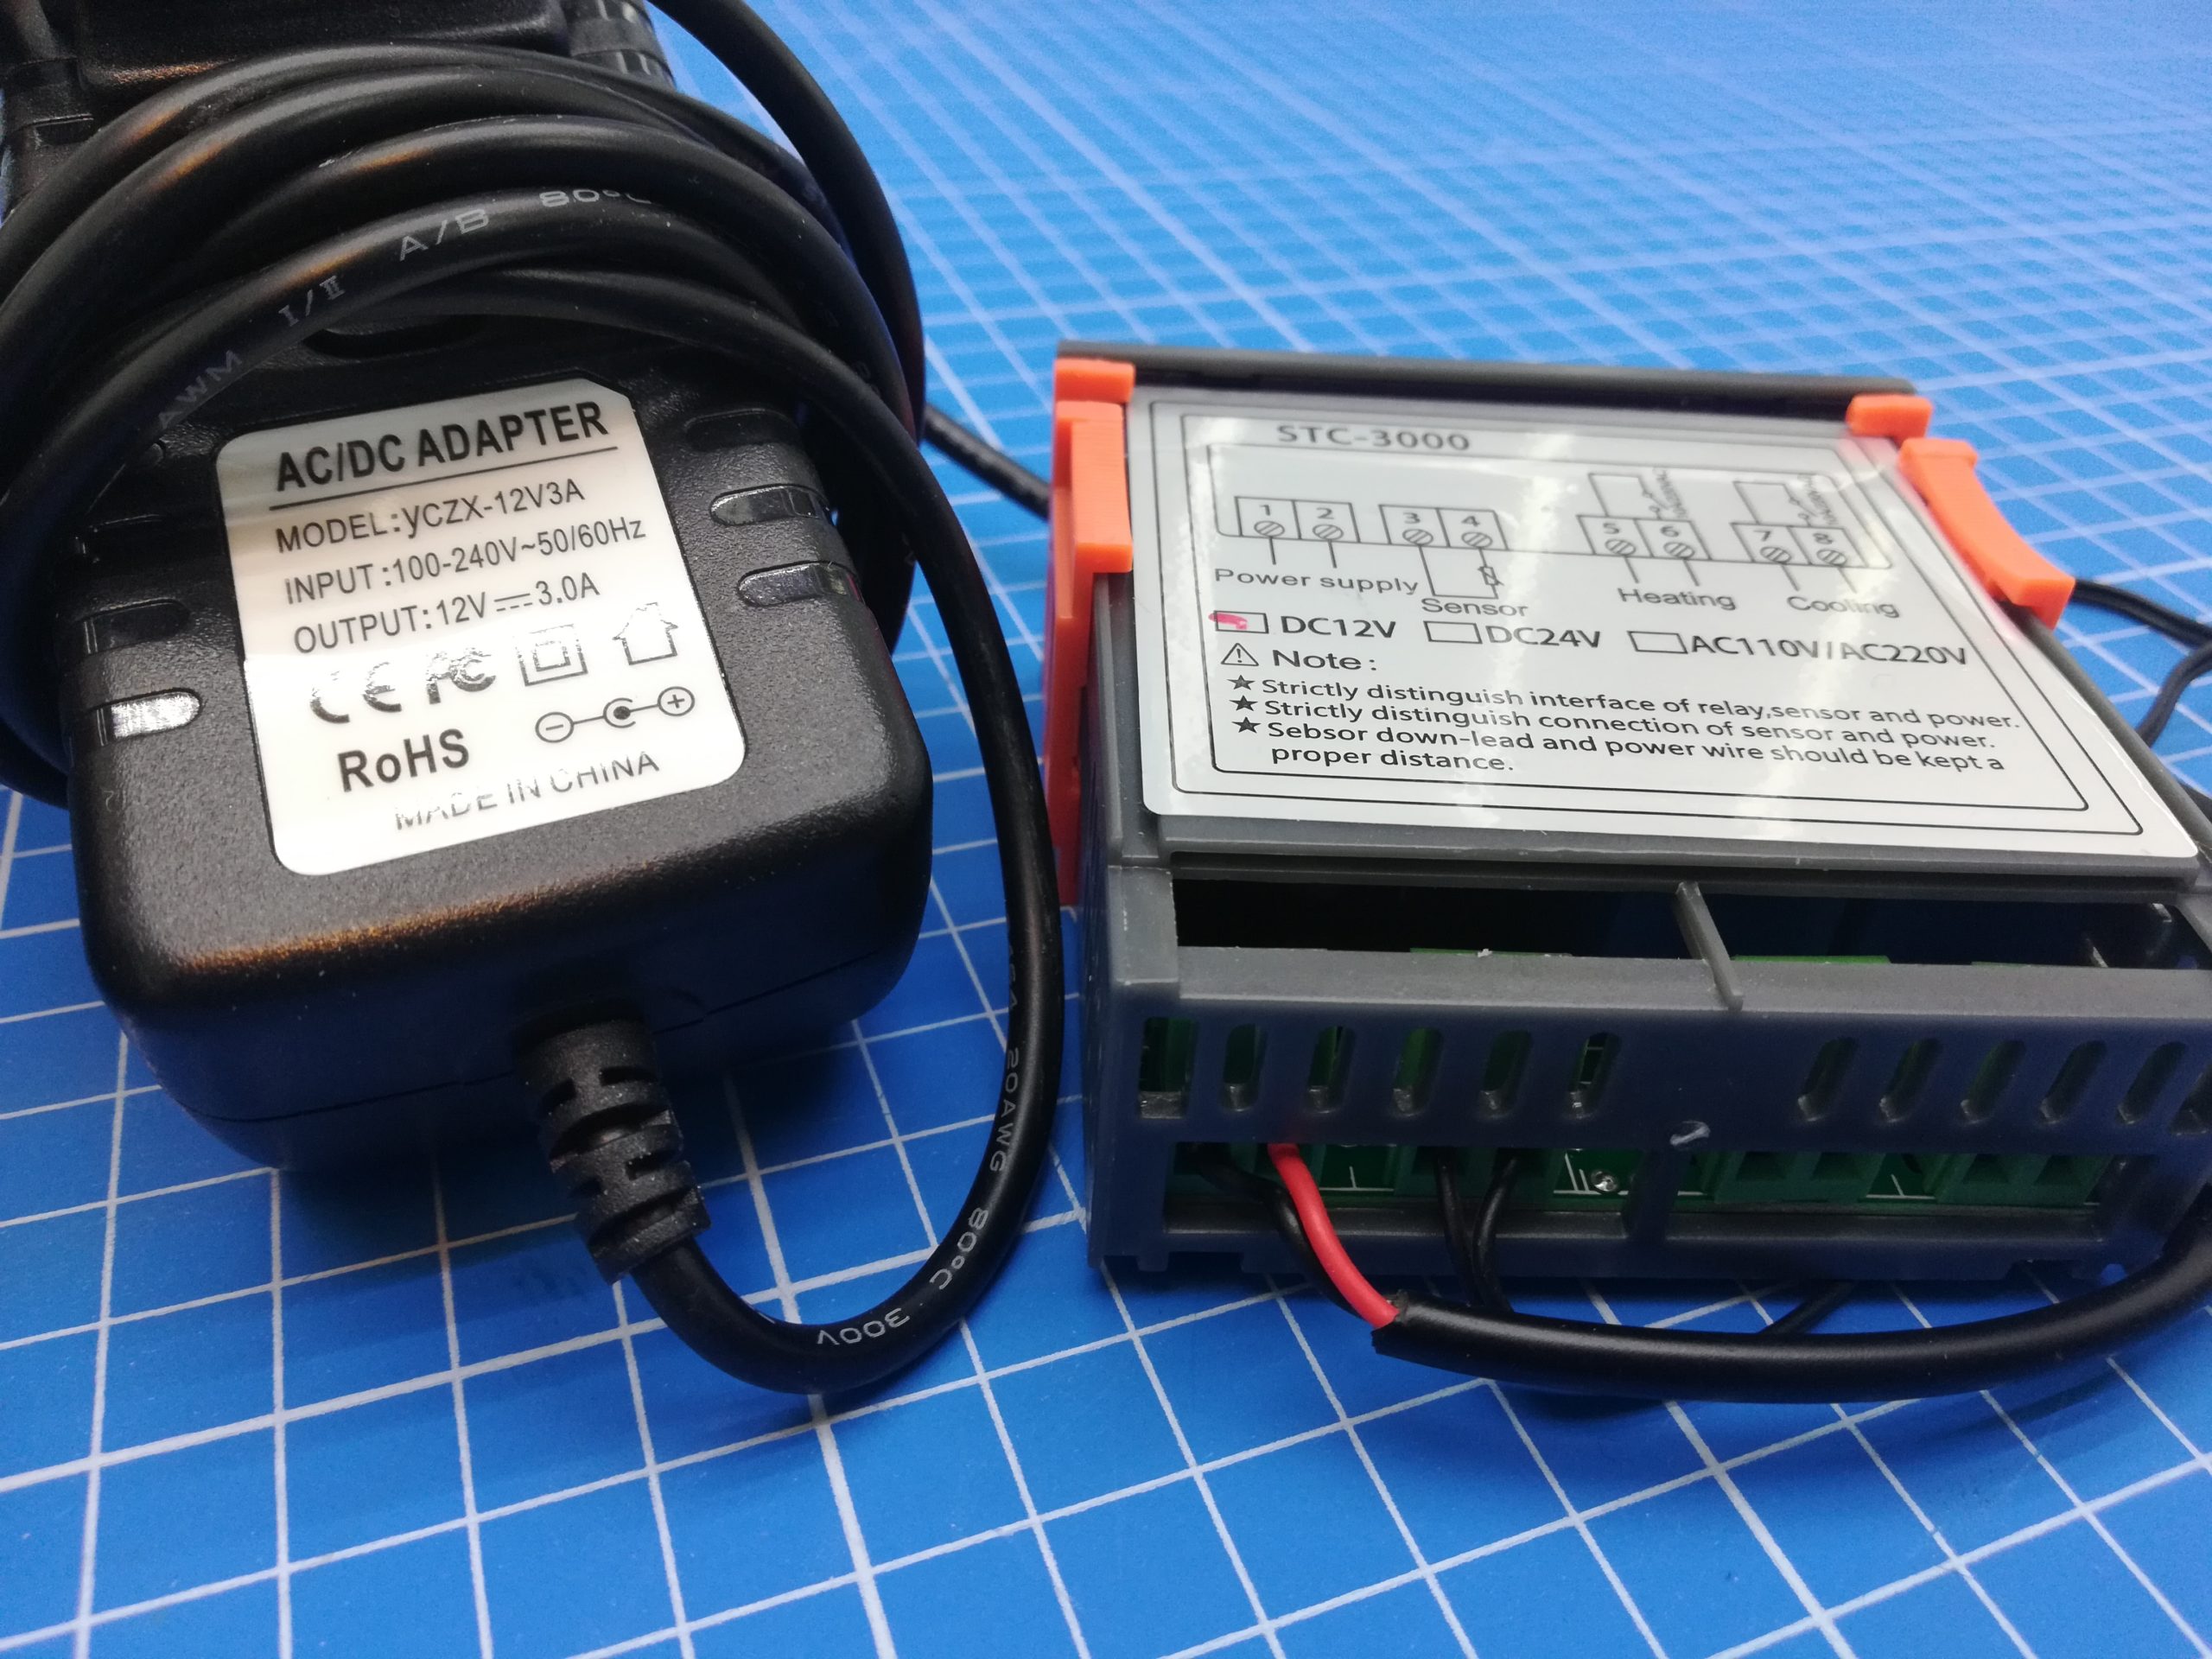
On the top of the STC 3000 you can check what type of voltage it is. There are three options to choose from: For alternating voltage (AC) “110-220VAC” and for direct voltage (DC) “12V” and “24V”. Now that you have checked which of the 3 options applies to your own device, you should wire the STC 3000 to the corresponding power source. The socket for the power supply corresponds to the sketch on the top of the STC.

Functionality
 In contrast to the STC 3008, there is only one “sensor” next to the “Power Supply”. There are also 2 relays on the right. One labeled “Heating” and one labeled “Cooling”. With the STC 3000 we will set a certain degree as the desired temperature and another as the maximum temperature difference. If the temperature sensor measures a value that is below the desired temperature and out of the maximum temperature difference, the “Heating” relay is activated (indicated by a red sun on the display). For example, a heating plate is connected to the “Heating” relay to generate heat. This also heats up the temperature sensor. As soon as the desired temperature is reached, the “Heating” relay switches off. However, if the heating is too high and the temperature sensor measures a value that is greater than the desired temperature plus the maximum temperature difference, then the “Cooling” relay is activated (recognizable as a blue snowflake symbol). The “Cooling” relay can be connected to a fan, for example. So the temperature always stays at the desired value.
User guide
When switched on, the STC 3000 first shows the current temperature. If you now press the up arrow key, you can see which desired temperature is set. The default value is 10.0 degrees Celsius. The down arrow key shows the value by which the desired temperature may deviate as much as possible. The default value is usually 3 degrees Celsius.
To make your own settings, press and hold the “S” button. The value “F1” appears. With the arrow keys you can navigate from “F1” to “F5”. The following table explains what the individual “F” stand for:

To change a value, navigate to the desired “F”. For example, to “F1” for the target temperature. Then briefly press “S”. The currently set target temperature appears. If you hold down “S”, a new value for the target temperature can be set with the arrow keys. The other “F” work analogously.
Specifications
- Switches the modes between cool and warm
- Controls temperature by setting the desired temperature value and the maximum difference value
- Temperature measuring range: 50 °C ~ -99 °C
- Accuracy: ± 1 °C (50 °C ~ 70 °C)
- Resolution: 0.1 °C
- Power consumption: <3W
- Relay contact capacity: Cooling (10A / 220VAC); Warmth (10A / 220VAC)
- Ambient temperature: 0 °C – 60 °C
- Storage temperature: -30 °C ~ 75°C
- Relative humidity: 20-85% (no condensate)
- Voltage: 12V / 24V / 220V
- Size: 75 * 34.5 * 85mm


Is it okay if I promote this post on Twitter? It’s very good 🙂
I’m very happy to read this. This is the kind of manual that needs to be given and not the random misinformation that’s at the other blogs. Appreciate your sharing this great doc!
Followed your instructions and got perfect results. Thank you very much!
Is this STC 3000 basically identical to a STC 1000, but with extra Celcius / “Fainthearted” setting?
very helpful, thanks!
Thank you for the guide, helped a lot!
Thanks for the guide! Really thank you!
Very good blog.Much thanks again. Fantastic.
I get pleasure from, result in I found exactly what I was looking for.You have ended my four day long hunt! God Bless you man. Have anice day. Bye