
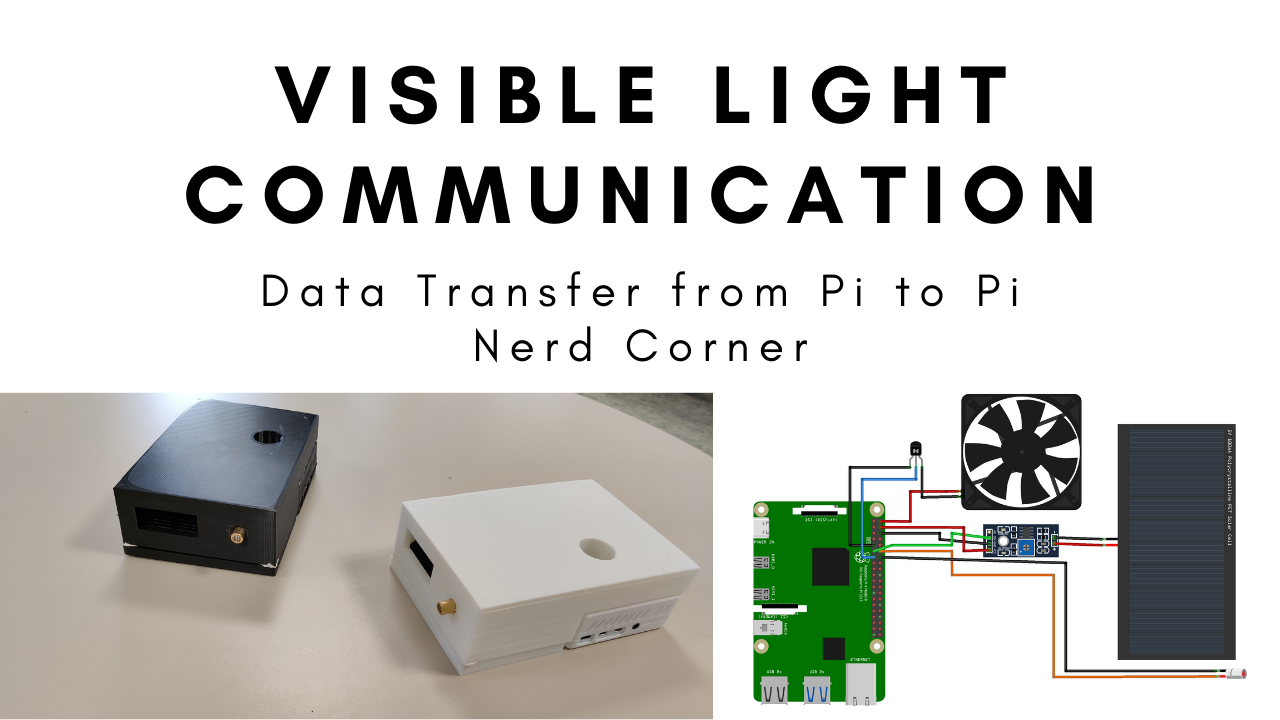
After I already transferred simple text messages via light signals from a Raspberry Pi to an Arduino Uno ( Link: https://nerd-corner.com/sending-text-messages-with-visible-light-communication/ ), I wanted to improve this system to be able to transfer any file formats in both directions. Since a Raspberry Pi uses Linux, this system can be transferred to any Linux device for data transfer via VLC (visual light communication). The software code and STL files can be downloaded at the end of the blog entry.
This might also be interesting for you: Sending text messages with light signals
Closely related to this article: Error detection during data transmission
Also relevant: Precise Timer in C for data transfer
List of components
- 2x Raspberry Pi 4
- 2x 5V Solar cell
- 2x 5V Laser diode
- Jumper cables
- 3D printer
- Filament
- 2x 5V Fan
- NPN Transistor
- 2x ADC Board with a LM393 dual comparator
Wiring
Unlike the wiring in the last article, where text messages were sent from a Pi to an Arduino via light signals ( Link: https://nerd-corner.com/sending-text-messages-with-visible-light-communication/ ), there is now no defined receiver and no defined transmitter. Instead, two identical stations are set up that can both send and receive data.
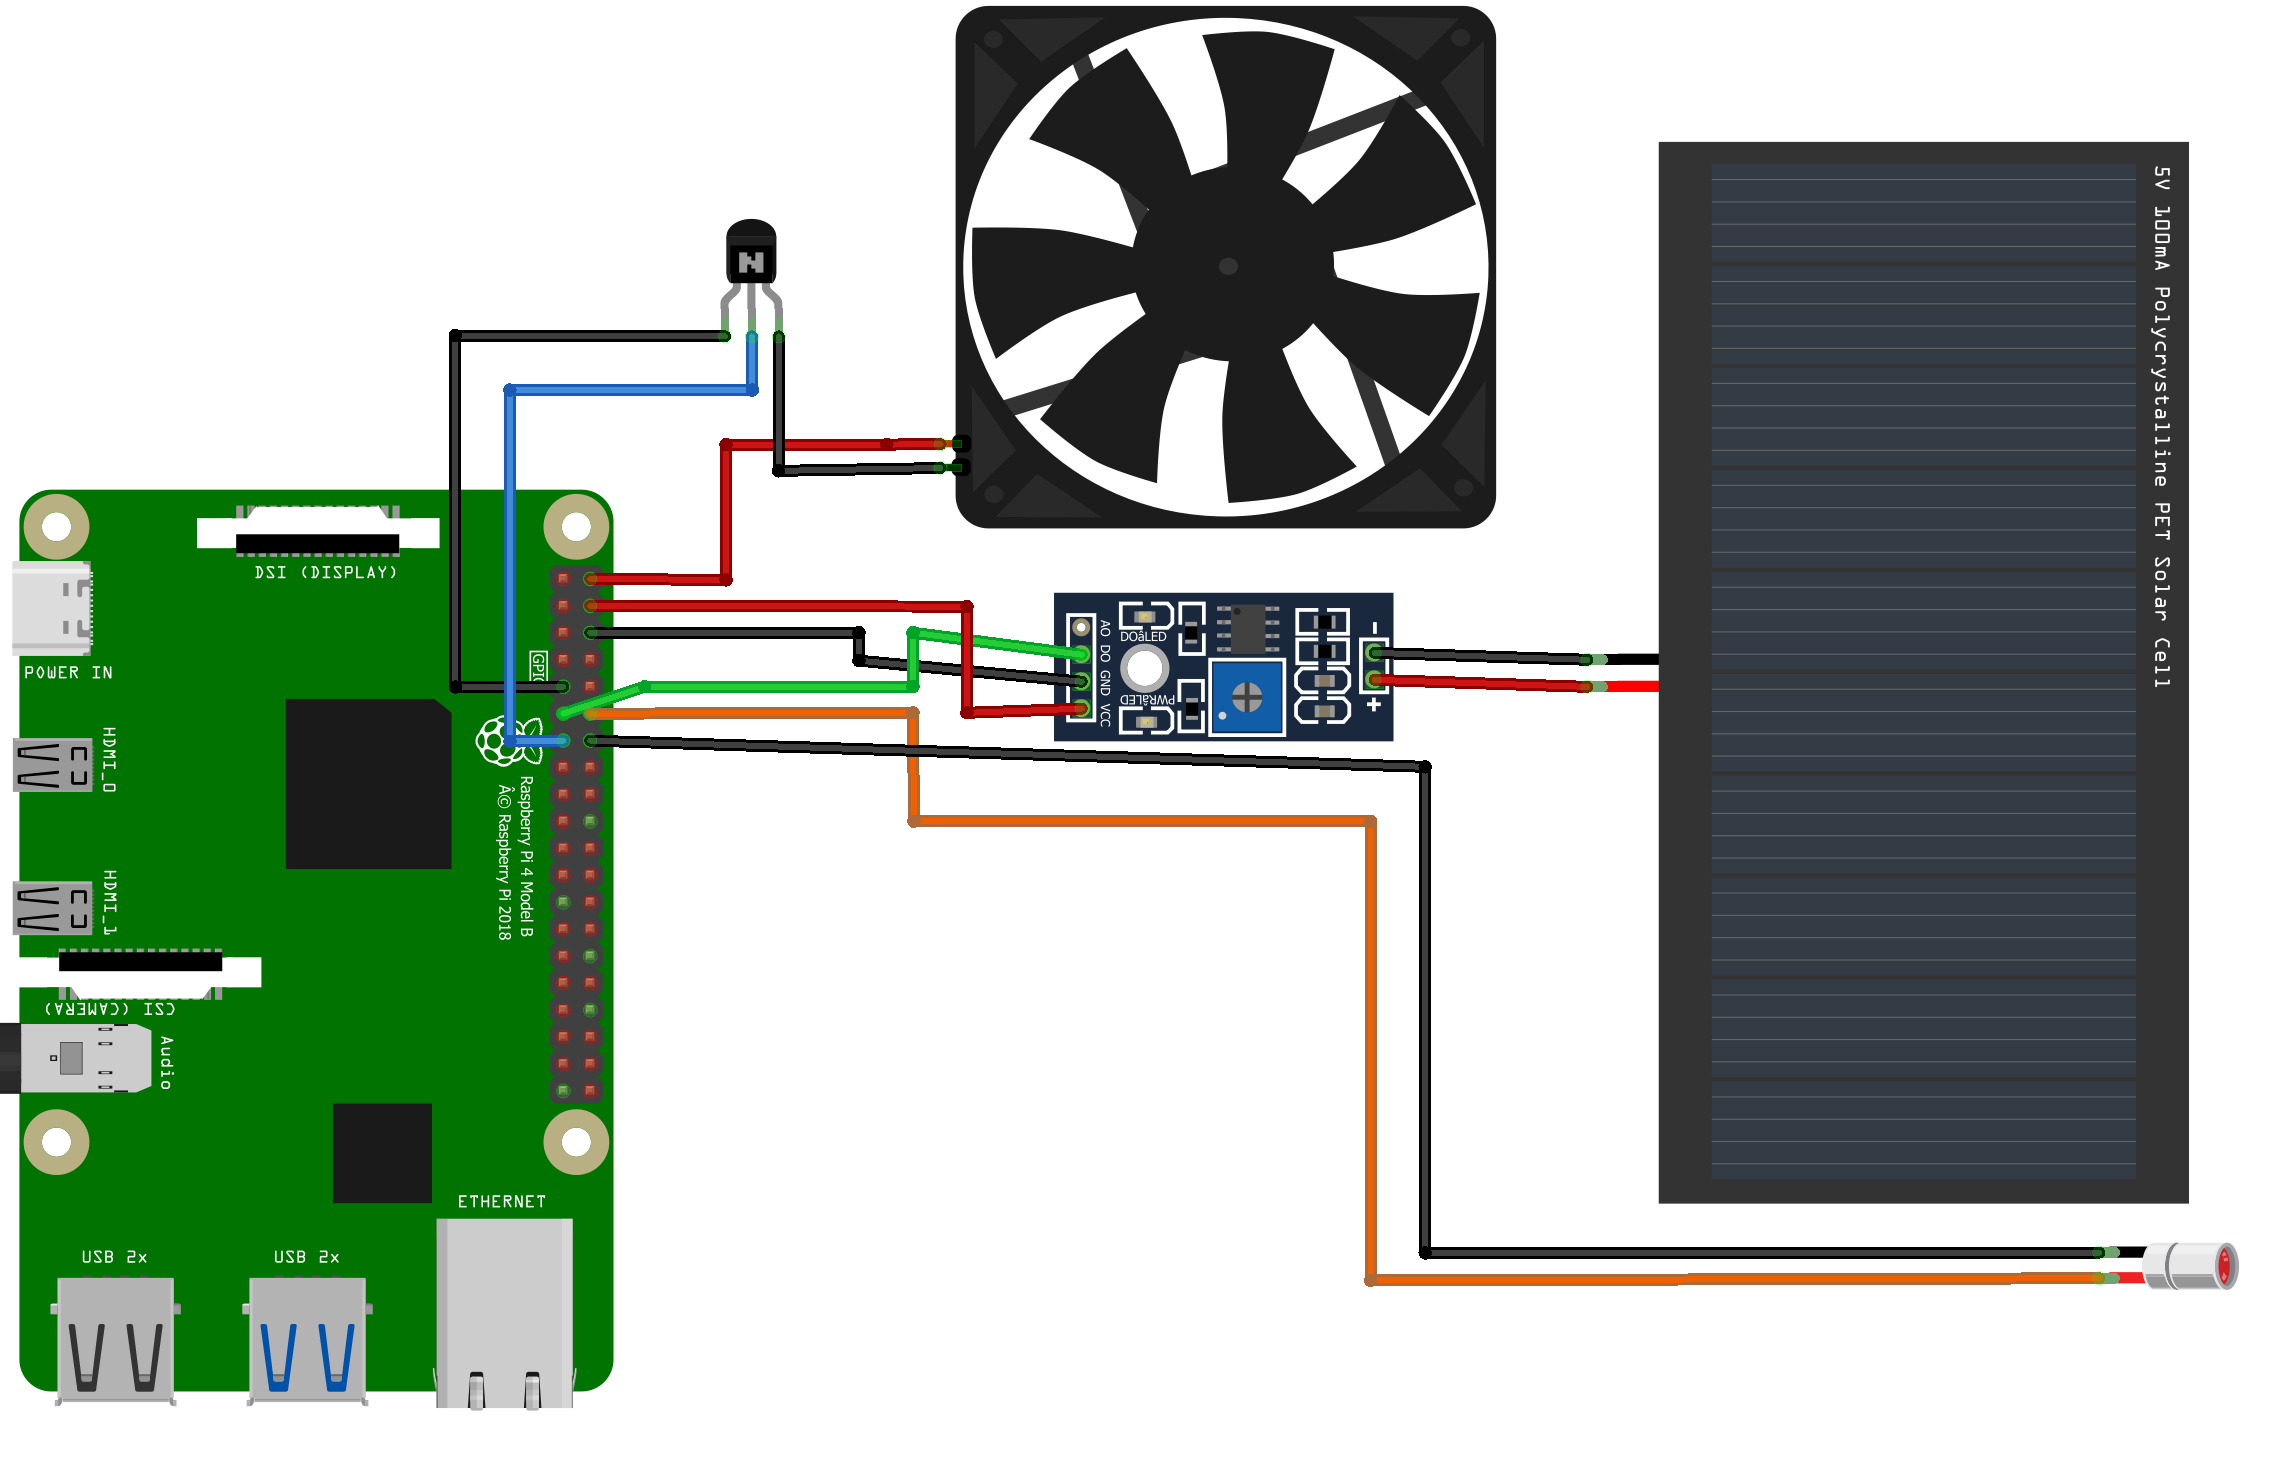
For this reason, the Raspberry Pi’s are connected to both a 5V laser and a 5V solar cell. For the laser the GPIO18 pin was chosen, which corresponds to pin 1 in the “wiringPi” library. The “wiringPi” library is used in the program code. Directly below GPIO18 is a ground, which is connected to the negative pole of the laser.
The solar cell provides a corresponding voltage value depending on the light intensity. But since the digital pins of the Raspberry Pi can only recognize 1 and 0, the analog value of the solar cell must be converted into a digital value with the help of a comparator. The process is explained in more detail in the section “ADC Board with an LM393 Comparator”. For the wiring, the plus and minus pole of the solar cell is connected to the plus and minus contacts of the ADC board. Then the ground of the ADC board is connected to a Raspberry Pi ground and for the power supply the plus pole of the ADC board is connected to 5V of the Pi. The D0 pin of the ADC board provides the digital value 0 or 1, depending on the light intensity of the solar cell. I connected this pin to GPIO17, which corresponds to pin 0 in the “wiringPi” library.
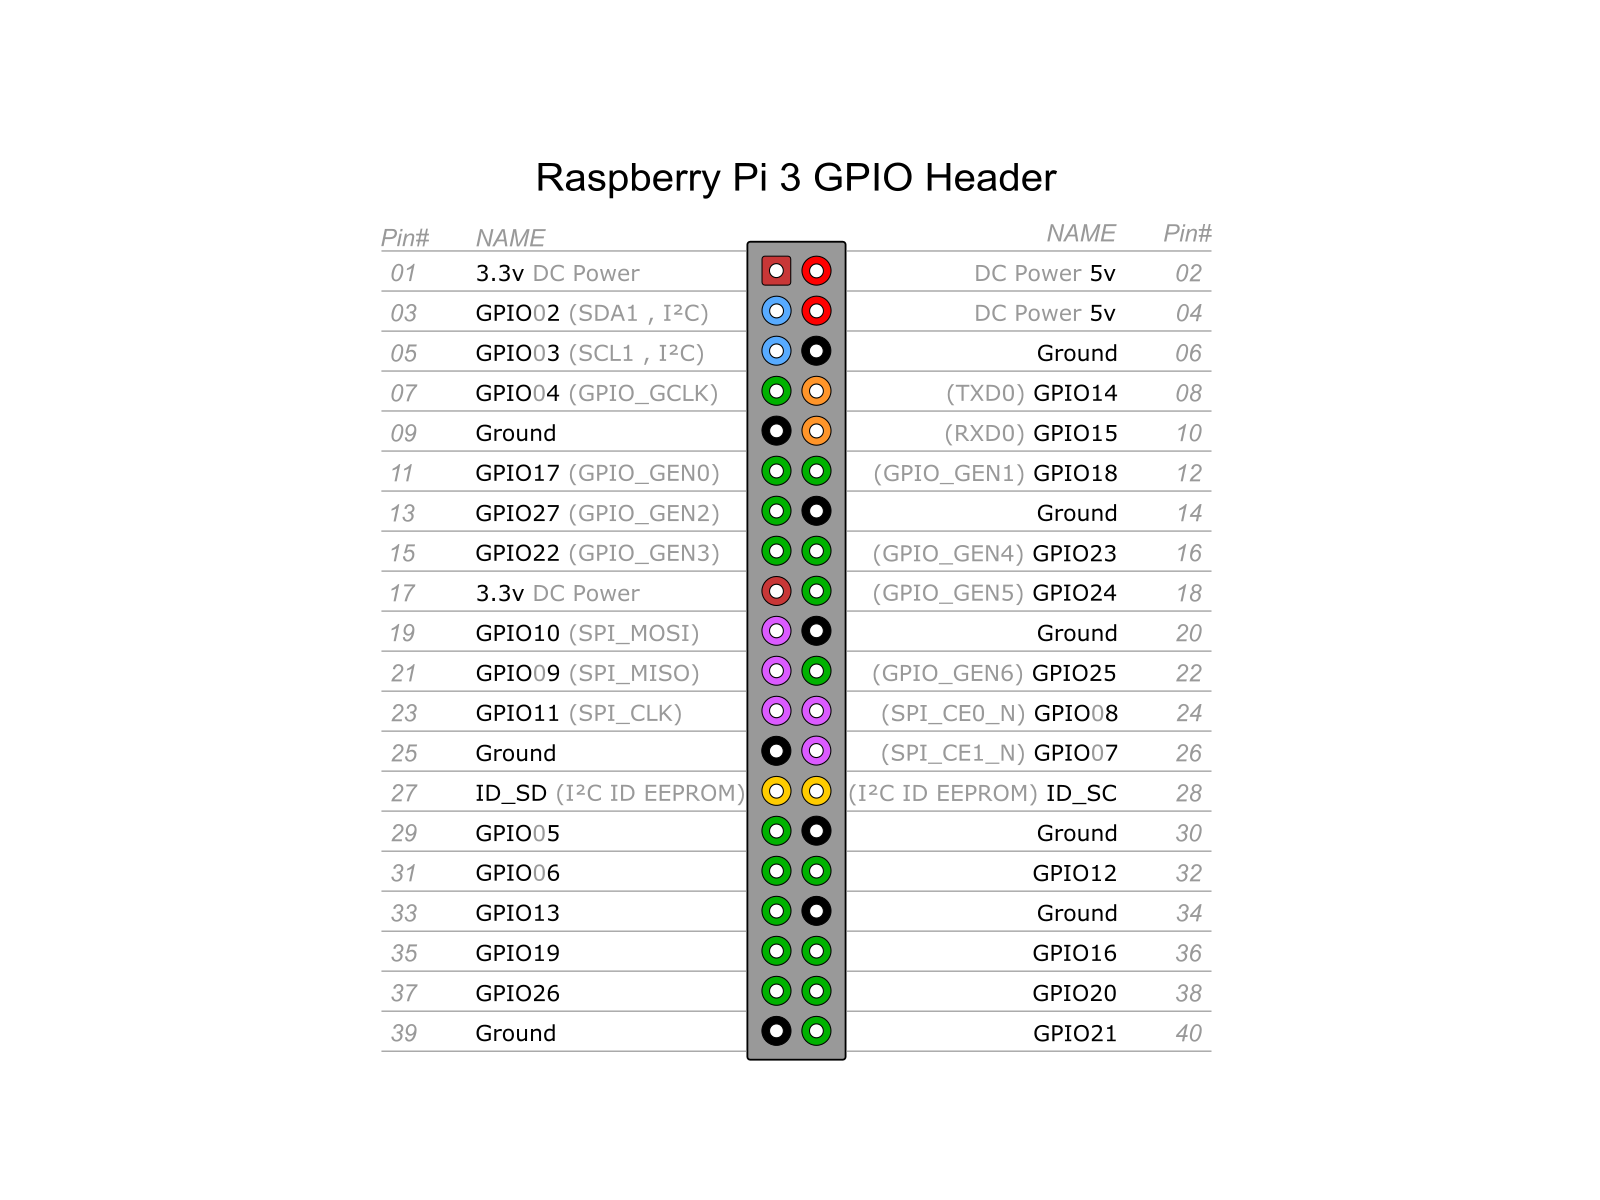
Since I noticed that the Pi gets very hot during operation, I connected a fan. So that the fan is not permanently in operation, which would have a negative effect on the performance of the laser, the fan can be switched on and off by a NPN transistor. Connect the positive pole of the fan directly to a 5V pin of the Raspberry Pi and the negative pole of the fan to the emitter of the NPN transistor. The collector of the transistor is connected to a ground of the Pi. To switch the fan on and off via the transistor, the transistor base is connected to a GPIO pin. For example I chose GPIO27 (corresponds to pin 2 in the “wiringPi” library). In the following table the pins of the Pi are compared to the numbering of the “wiringPi” library.

ADC Board with a LM393 camparator
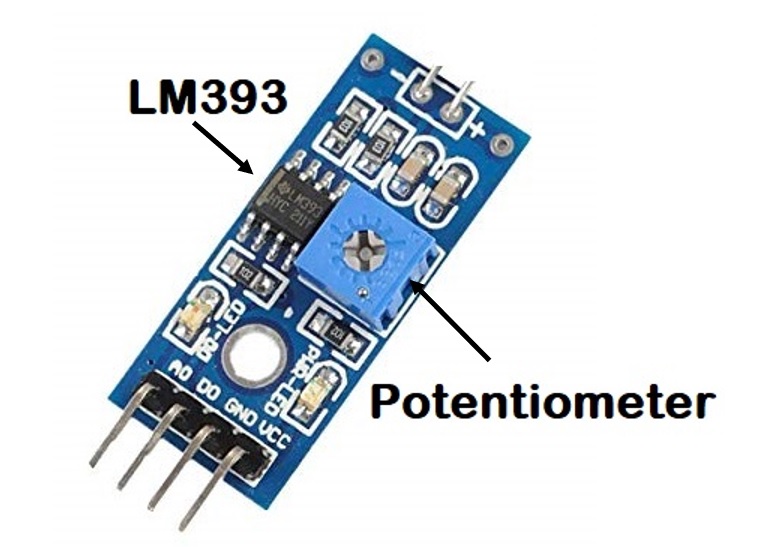
The solar cell returns a voltage value depending on the light intensity. Unfortunately the Raspberry Pi has no analog pins to read this voltage value. Therefore the analog signal has to be converted into a digital signal. This is possible with the help of the LM393 comparator. The comparator is often used on ADC boards. Here I simply replaced the original sensor (it was a photoresistor) through a solar cell. With the help of a potentiometer the comparator can be adjusted. That means, as soon as the voltage value of the solar cell, which depends on the light intensity, exceeds the adjusted value of the potentiometer, a digital 1 is measured, otherwise a digital 0.
Structure of the data frame

The data frame for sending the text messages using visual light communication (Link: https://nerd-corner.com/sending-text-messages-with-visible-light-communication/ ) consisted of a preamble, the length of the text message, the text content and the cyclic redundancy check. However, to be able to send all kinds of data instead of text messages, the file name, the file extension, the total number of packets and the number of the current packet must be specified instead of the length of the text message. Then the data content and the code of the cyclic redundancy check can be added.
Software code for data transfer via VLC
Basically, the receiver and sender scripts from the previous project on sending text messages using visual light communication (link: https://nerd-corner.com/de/textnachrichten-mittels-lichtsignale-senden-pi-zu-arduino/ ) were further developed and combined into one single script. Which is applied on both Raspberry Pi’s. For example, a “ReadFile” and “WriteFile” function was added, which can read files and combine and save received data packets to a file. The program was written in C again, because a high speed of data transfer should be achieved. Details about precise programming in C for fast data transfer are given in this article: https://nerd-corner.com/how-to-program-a-highly-precise-timer-in-c-for-linux/ .
The complete software code for data transfer using VLC can be downloaded at the end of the article. The core of the program is again a state machine with the help of which can be selected whether data should be sent or received. In addition, the program automatically turns on the fan when no data transfer is taking place. Important: When compiling please do not forget the “wiringPi” library and the “math.h” library! The command is: “gcc -o transceiver transceiver.c -lwiringPi -lm”.
while(1)
    {
        digitalWrite (2, HIGH);
        printf("Press the R button for Receiver Mode or any other key for Sender Moden");
        scanf(" %c",&mode);

        if (mode=='R'||mode=='r')
        {
            digitalWrite(2,LOW);
            modeReceiver=true;
        }

        if (mode!='R'&&mode!='r')
        {
            digitalWrite(2,LOW);
            modeReceiver=false;

            char dataName[NAME_MAX];
            char dataExtension[NAME_MAX];


            printf("n Name of file WITHOUT extension: ");
            scanf("%s",dataName);

            printf("n Extension: ");
            scanf("%s",dataExtension);

            if (read_file(dataName, dataExtension, file_content) != OK)
            {
                printf("File read error, size exceeds array sizen");
                return -1;
            }
            BuildDataFrame(dataName, dataExtension, file_content);
        }


        while(modeReceiver)
        {
            gettimeofday(&tval_after, NULL);
            timersub(&tval_after, &tval_before, &tval_result);
            double time_elapsed = (double)tval_result.tv_sec + ((double)tval_result.tv_usec/1000000.0f);

            while(time_elapsed < 0.001)
            {
                gettimeofday(&tval_after, NULL);
                timersub(&tval_after, &tval_before, &tval_result);
                time_elapsed = (double)tval_result.tv_sec + ((double)tval_result.tv_usec/1000000.0f);
            }
            gettimeofday(&tval_before, NULL);

            int data = digitalRead(0);


            switch (state)
            {
                case 0:
                    //looking for preamble pattern
                    synchro_Done=false;
                    LookForSynchro(data);

                    if (synchro_Done==true)
                    {
                        state=1;
                    }
                    break;

                case 1:
                    //receive the actual data
                    receiveData_Done=false;
                    senderState=false;
                    ReceiveData(data);

                    if(receiveData_Done&&senderState==false)
                    {
                        state=0;
                    }
                    if(senderState==true){
                        senderState=false;
                        state=0;
                        modeReceiver=false;
                        }
                    break;

            }

        }
    }
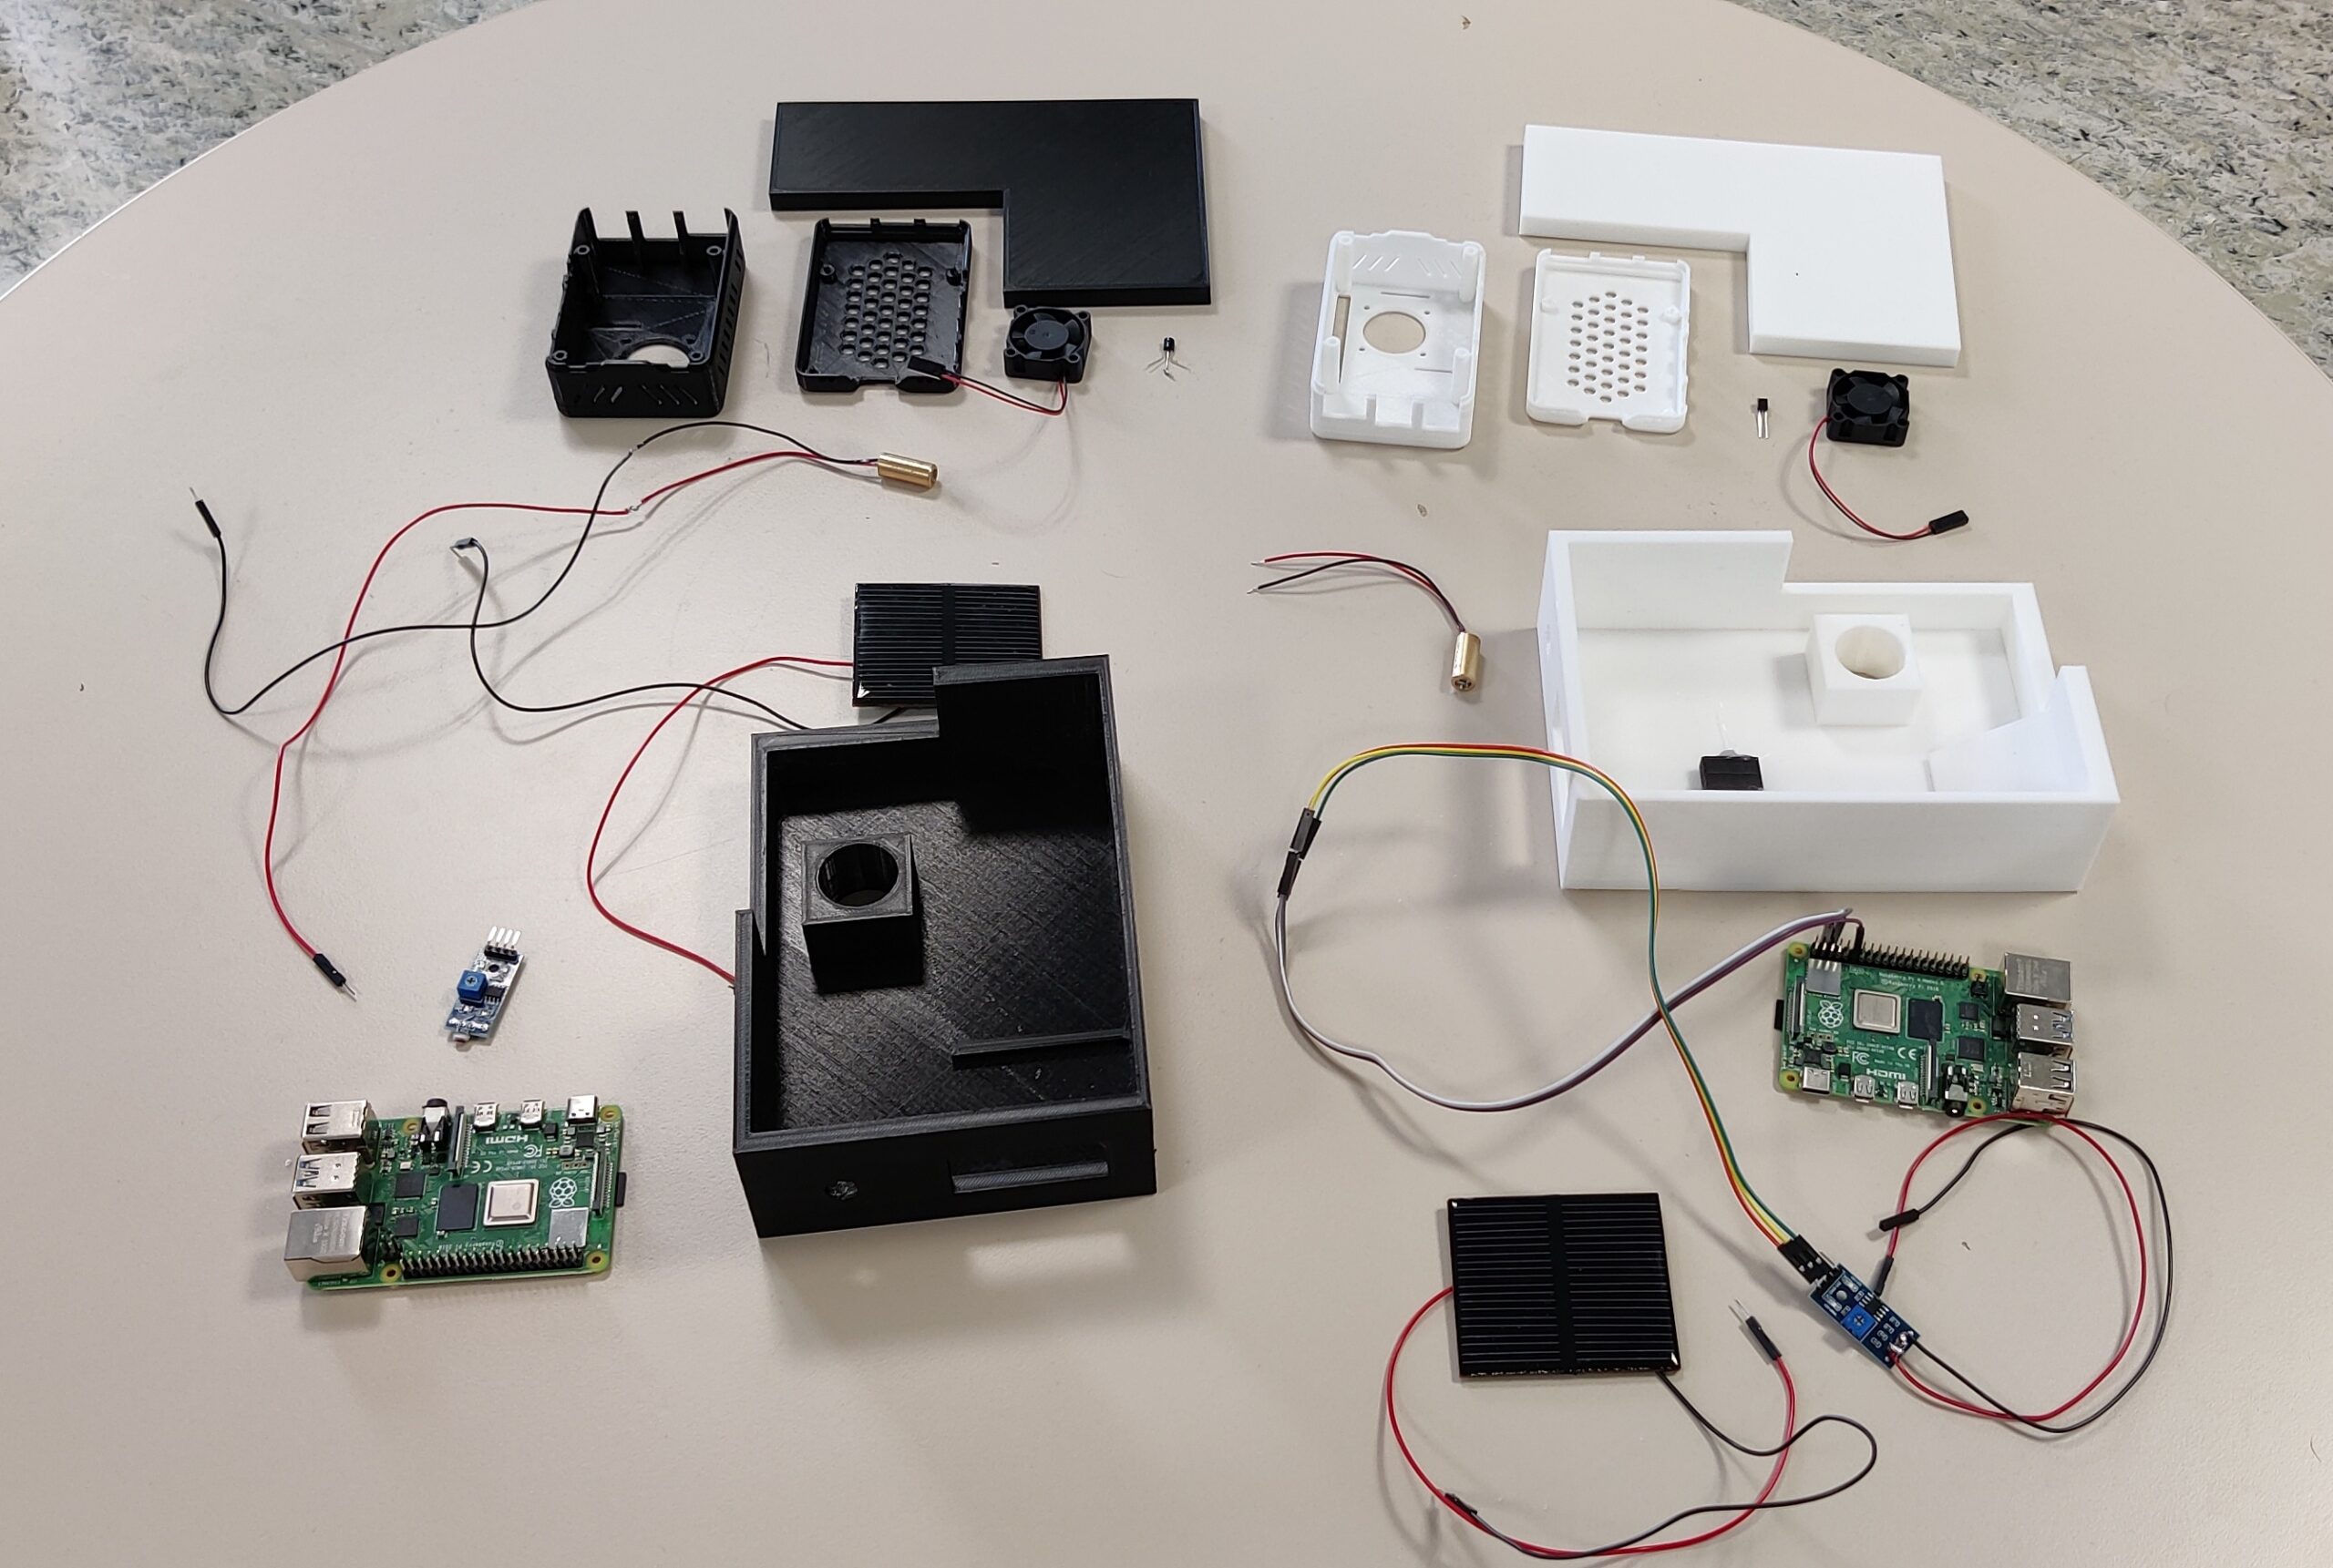
Housing
In order to be able to hold the components in place, a housing was constructed in CAD. This also has the advantage that no complicated alignment of the lasers and the solar cells is necessary for the data transmission. For beginners, TinkerCAD is suitable for housing design. TinkerCAD is free and can be used directly in the browser. Alternatively, the STL files for the 3D printer can also be downloaded here.
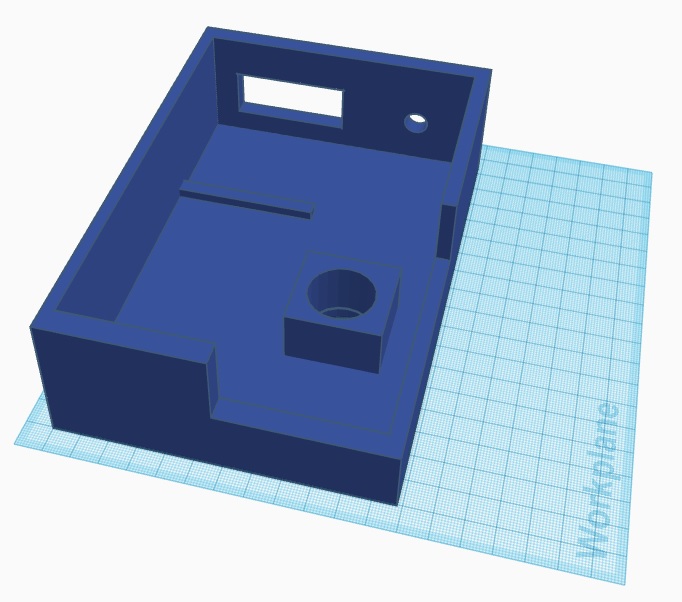
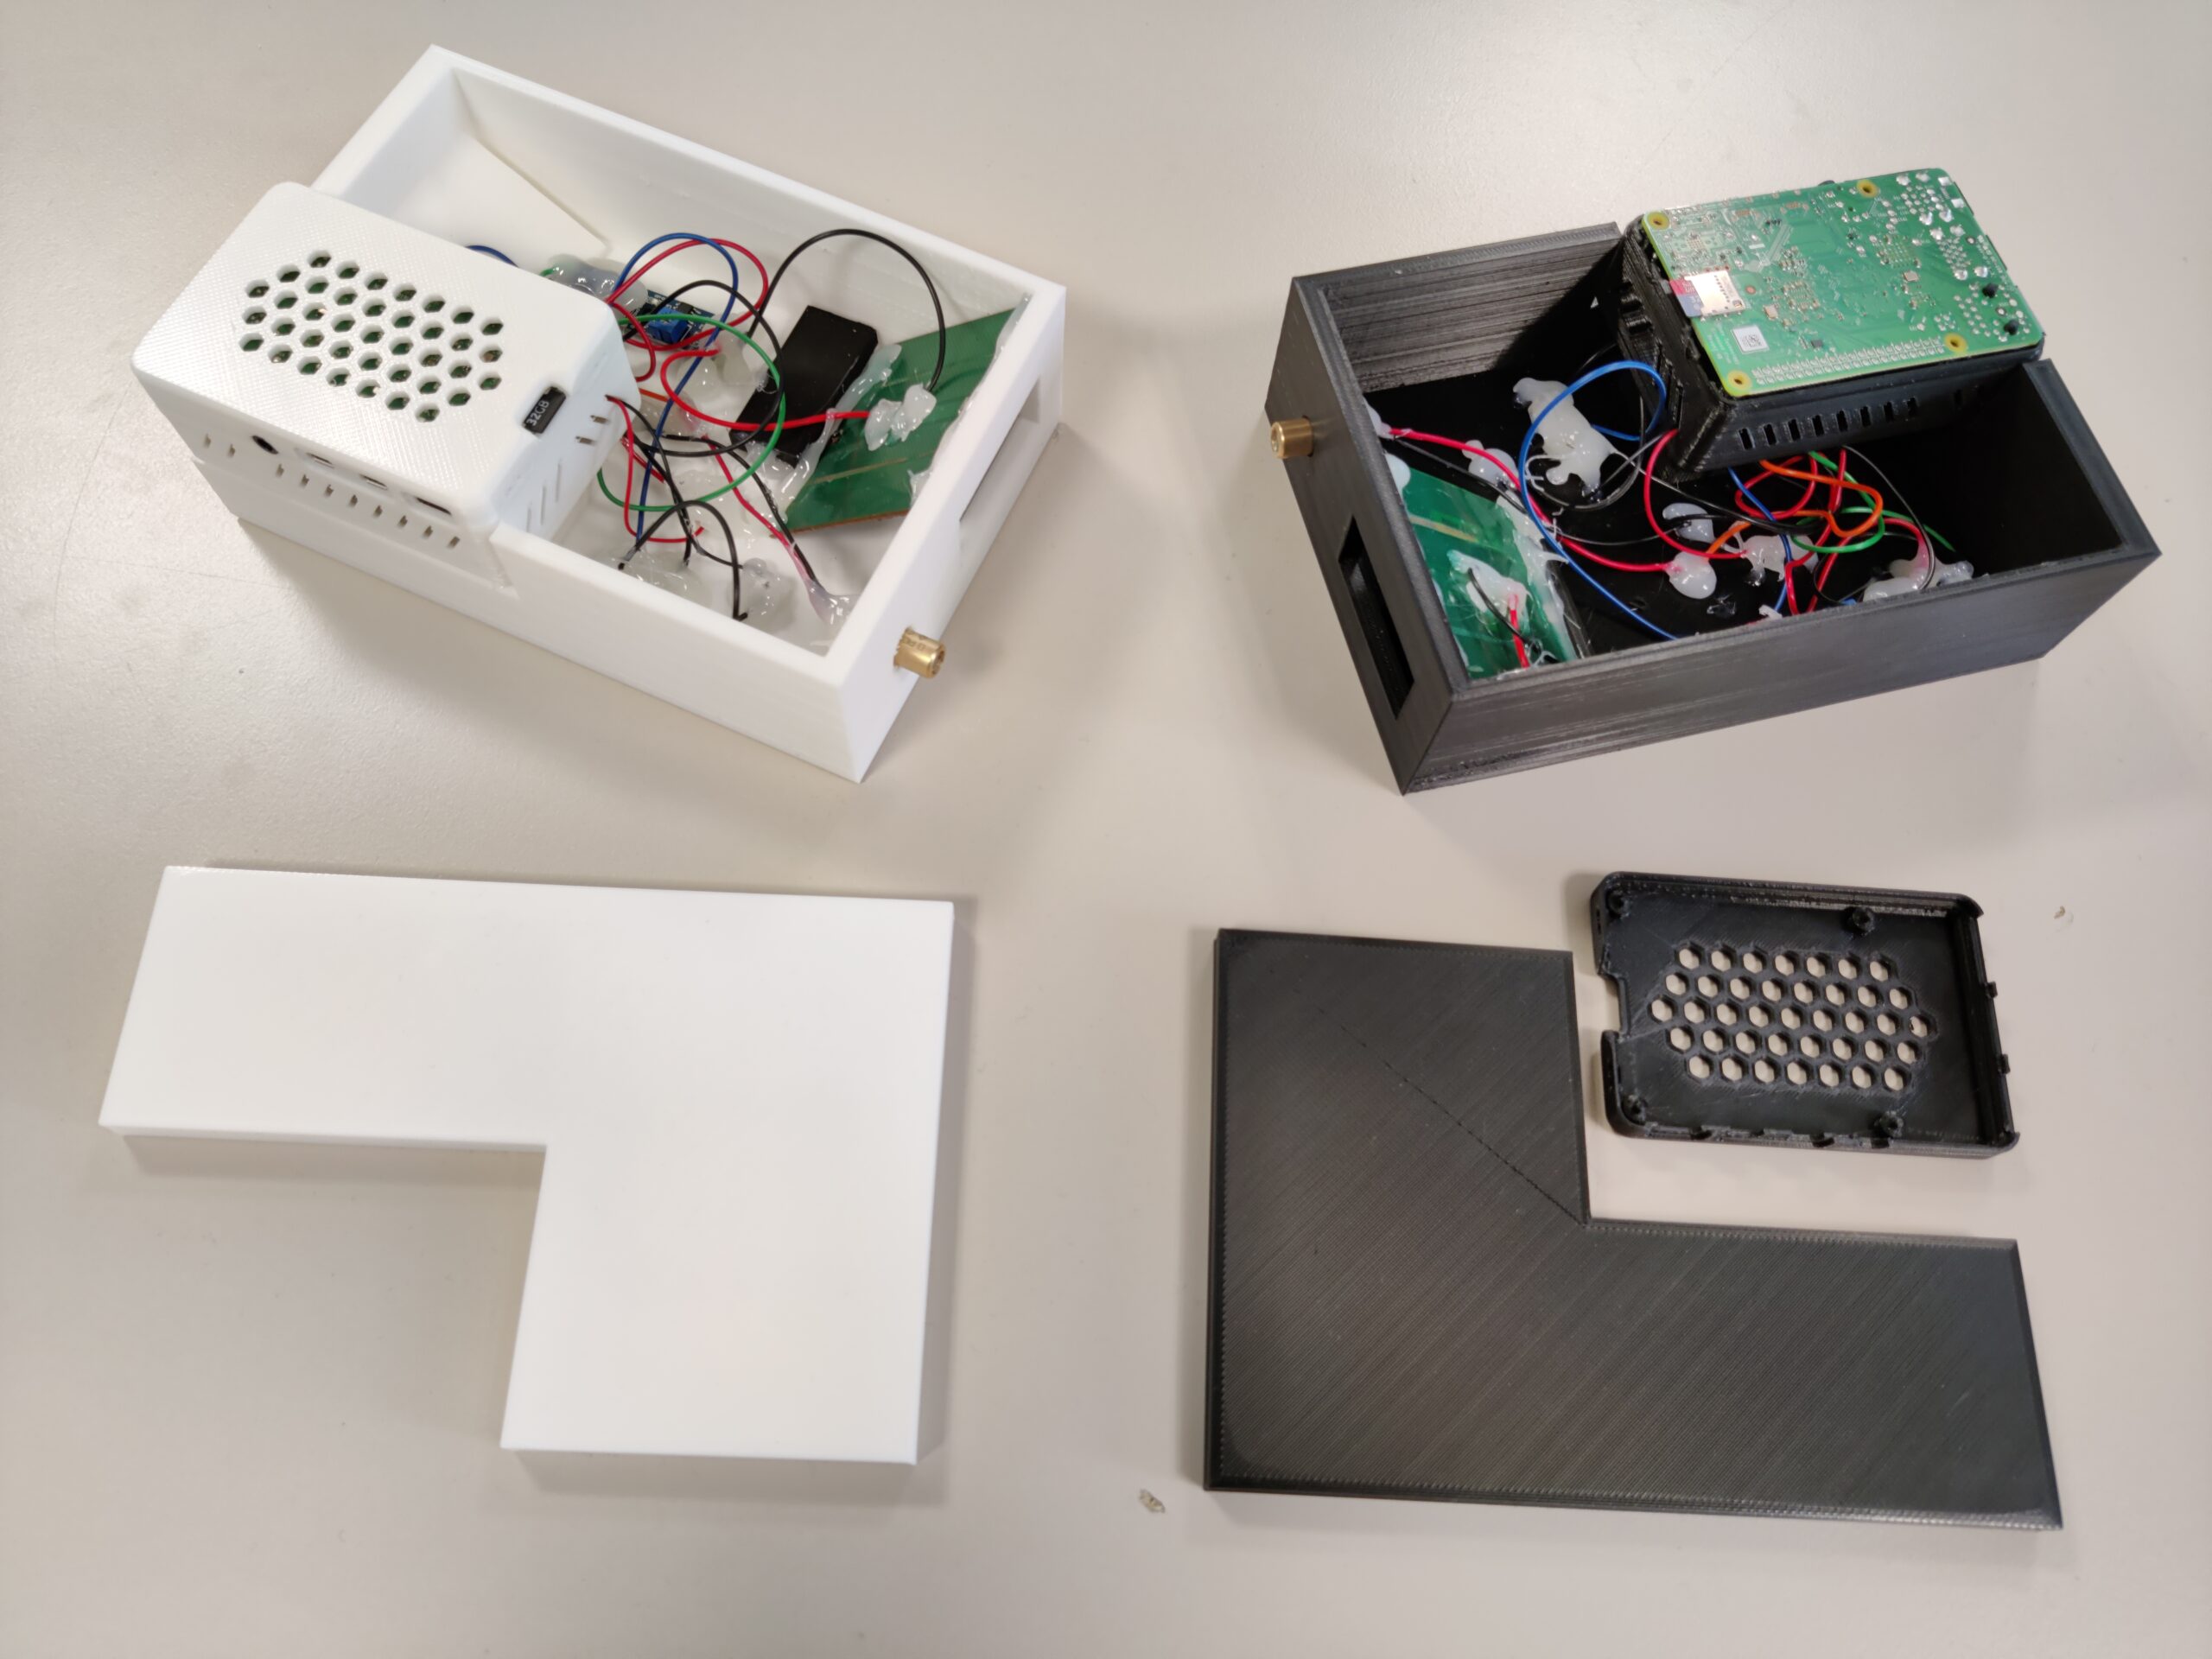
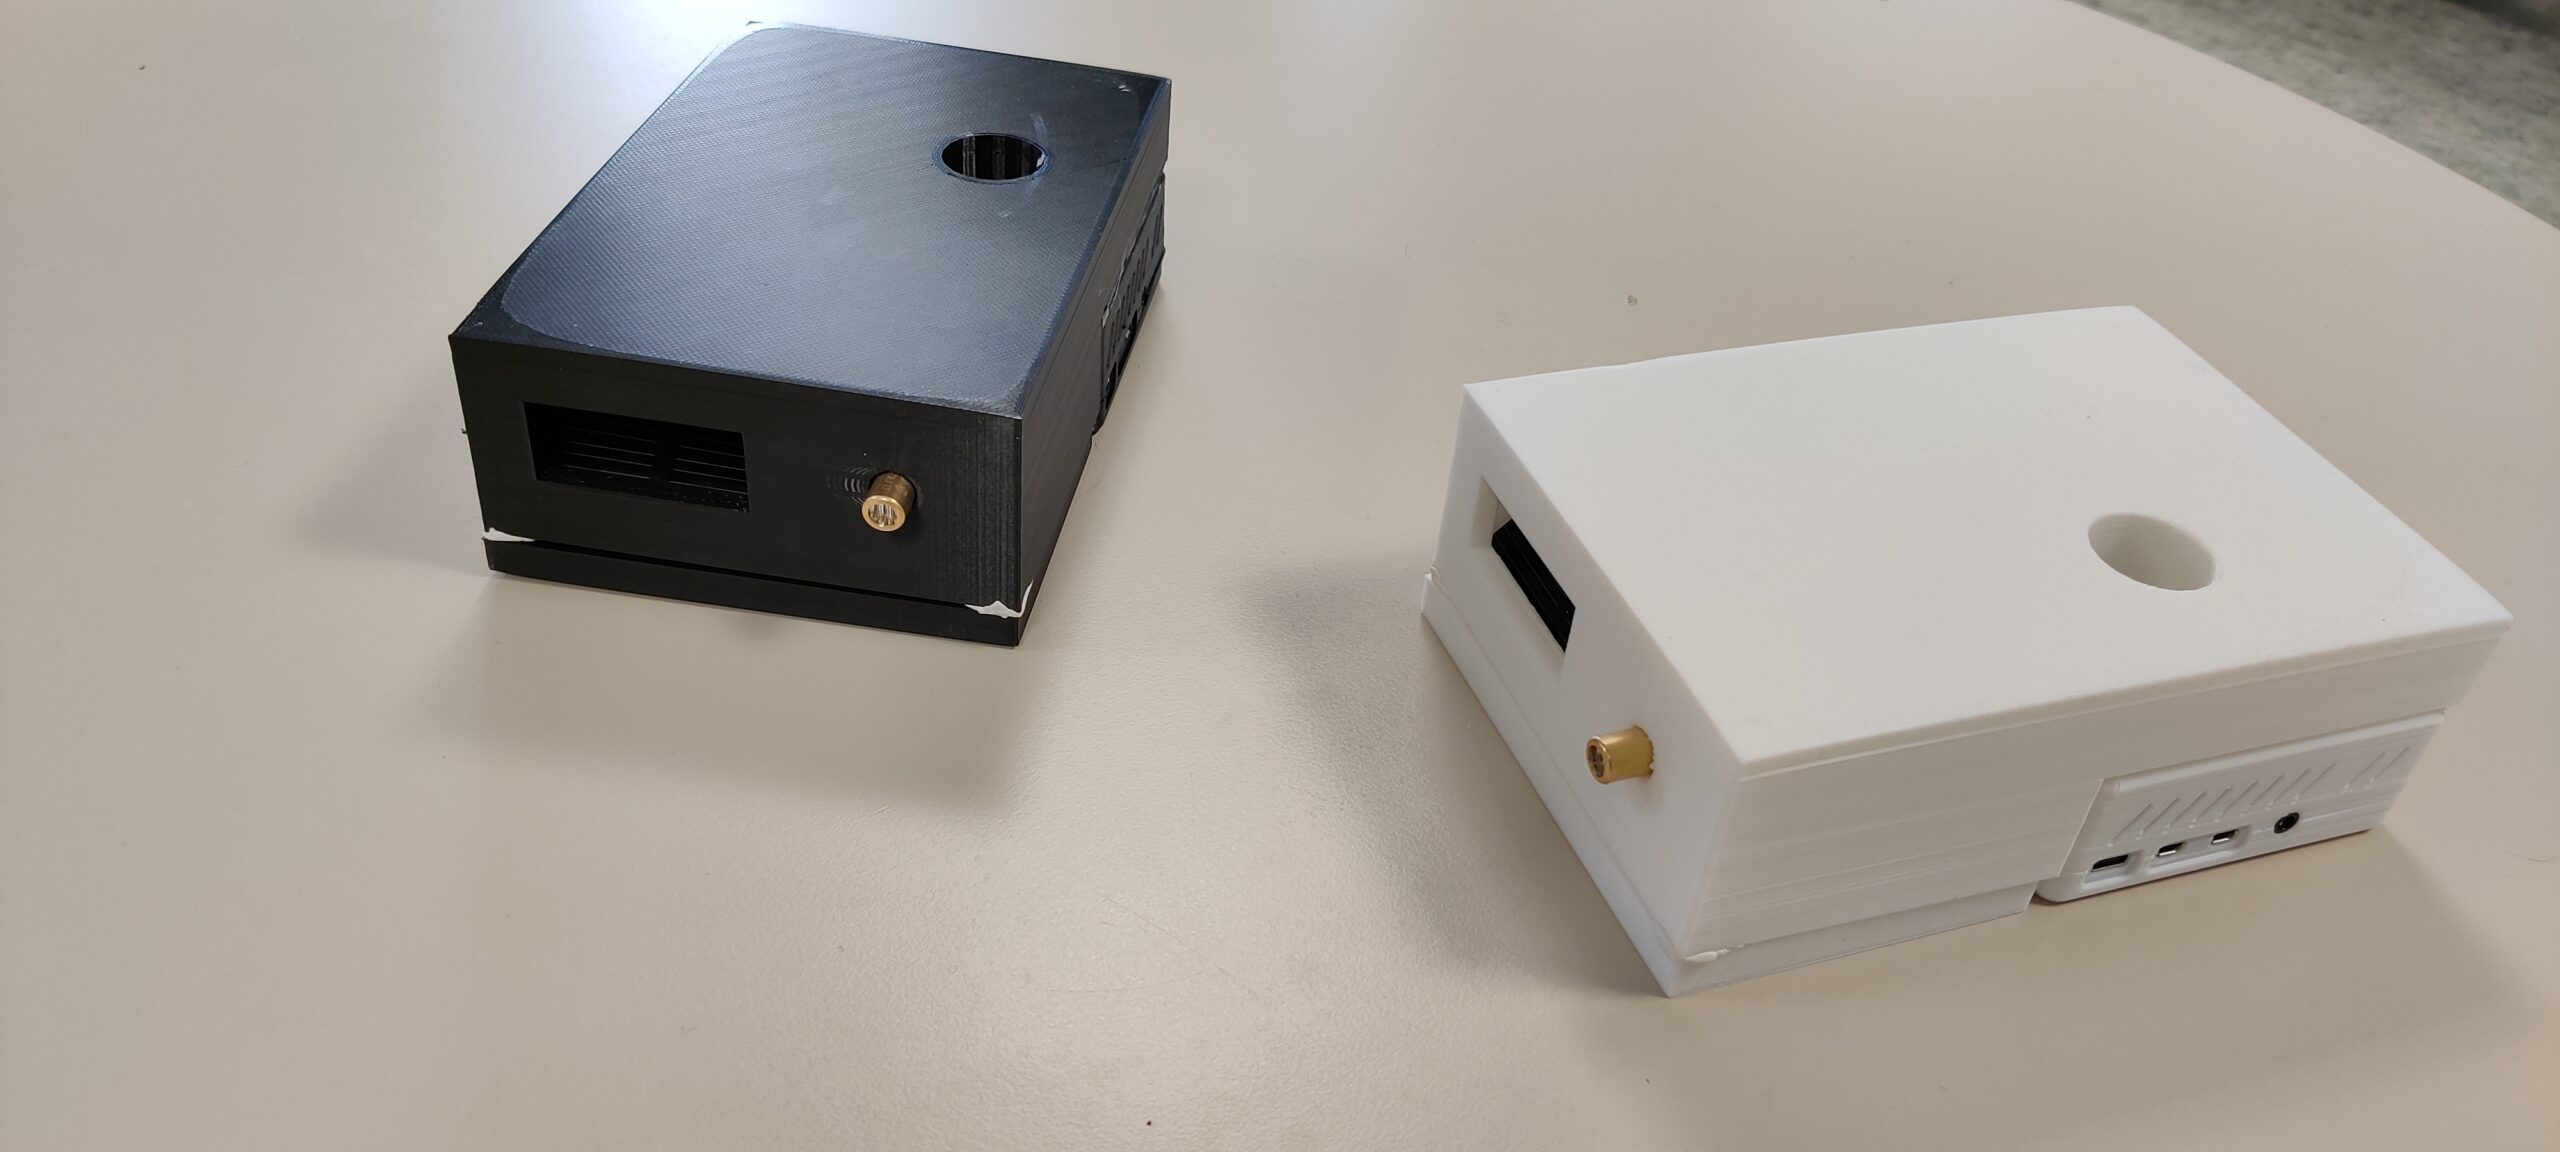
The housing for data transfer via VLC has an opening for the solar cell and the laser. In addition, an exhaust vent for the fan was constructed and space was also left free for a Raspberry Pi housing. The following picture shows the installation of the components.
Conclusion about data transfer via VLC
The existing system for sending text messages by means of visual light signals was further developed so that all types of data can now be sent and received. The system works amazingly successfully. It is very robust and achieves a data rate of 1 kbps to 10 kbps. All incoming data packets can be directly assigned due to the intelligent structure of the data frame. Only an acknowledgement signal would be a useful addition. Such a signal would be a feedback from the receiver to the sender to inform the sender that all packets have arrived, or possibly a certain packet was faulty and must be sent again.
Also interesting for the future would be to investigate other types of modulation. In particular, I would like to explore color shift keying, which is specifically designed for visual light communication, and compare the resulting data rates.
Download files:
- Softwarecode Transceiver
- STL files housing
- Pi Case with free pins (Creative Common License from Thingiverse)


I have setup the pi and software but while trying to send the data file from source pi to target pi, I do not see any activity.
Hey Sam,
the reason for this could be the distance of the laser. If the laser beam is too weak then it is hard for the solar panel to detect something. You can also try to change the solar panel.
Hey. I was wondering what the limit file size was and if i could change it.
Hey,
for testing purpose a set the file size to 2,5kB. But you can change it!
I managed to increase the file size for transmitting, but the receiver seems to be limited. It won’t go past 2kb of data. Is there a way to fix?
Yes, you also need to increase the file size on the receiver side 🙂
I am very grateful for your blog article, needed it for my thesis