I bought a new 3D printer with a closed build chamber. At some point I noticed that one of the two extruders was clogged. The issue was, to unclog the extruder I needed light, because the build room light only works when the printer is on. When the printer is on, the fans would also start spinning, and those can quickly break if you slip off with the hex key. Therefore, I preferred to use a flashlight.
The flashlight was hard to position properly and it dazzled. For this reason, I came up with the idea of developing my own glare-free lamp, which you can simply place on the heating bed and is not blinding. Preferably wireless with a powerbank. I had already built my own powerbank with the Battery Shield V3, which I used as a basis this time.
This might also be interesting for you: Own powerbank with the Battery Shield V3

List of components
- 1 x Hollow socket 5,5×2,1
- 1 x Battery Shield V3
- 1 x LiPo 18650 3500mAh
- 1 x rocker switch 250V/3A mounting dimension 15×10,5mm
- 4 x hexagon socket head screws M2 x6
- 6 x raised countersunk head screws M2 x 20
- 17 x 5V SMD2835 LED strips
- 5 x jumper cable

Choice of LED
Since the basic housing of the powerbank with the Battery shield V3 was already finished, I mainly had to think about the lighting. LEDs with 5V or 3V should be used as illuminants, because the Battery shield V3 provides either 5V or 3V. For my purposes a lower lumen value is sufficient. After a short research I found suitable LED strips.
The light temperature of my LED strip is 6500K also called cold white. This light contains a lot of blue, which makes it easy to work with and details become visible quickly. Since the Battery shield V3 has three additional 5V and one USB A output, powering the LEDs is no problem.
The LEDs for the glare-free lamp are SMD2835. These are 2.5 mm wide and 3.5 mm long and have a slightly lower luminosity than a SMD5050. How much the LEDs consume is critical to the lamp’s burn time, as the power supply from the battery is limited.
Construction of the cover and middle cover
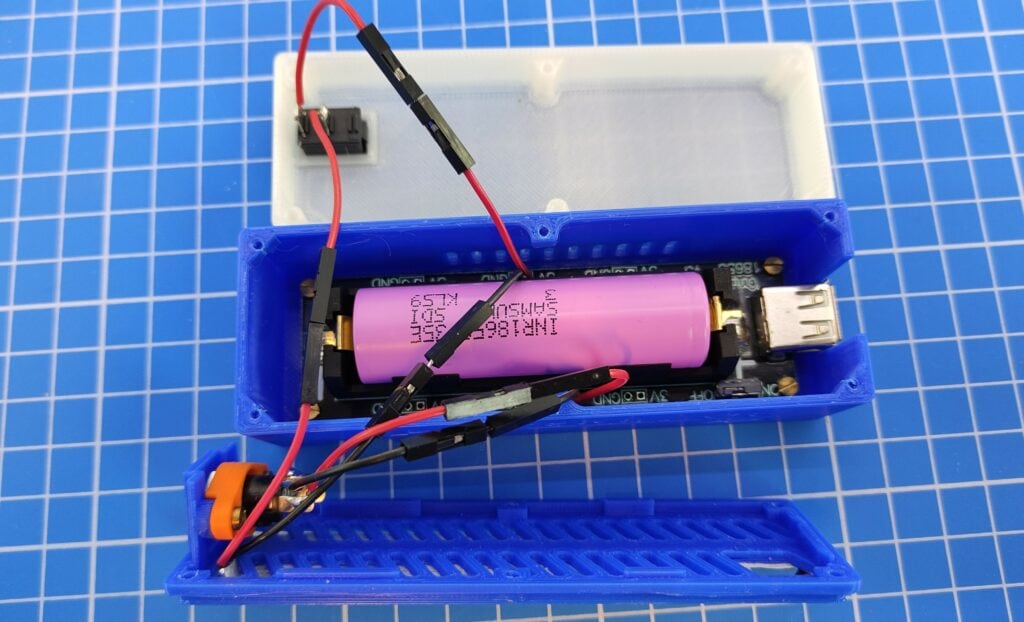
As already mentioned in the previous section, the base case of the powerbank is not changed. Instead, the LEDs are glued onto an inner cover. The middle cover also serves as a support for the hollow socket for the 3V output. Furthermore, a breakthrough was contructed to pass through the cables from the on-off switch. The slanted openings of the intermediate cover should help to apply adhesive to the LED strips from behind if necessary.

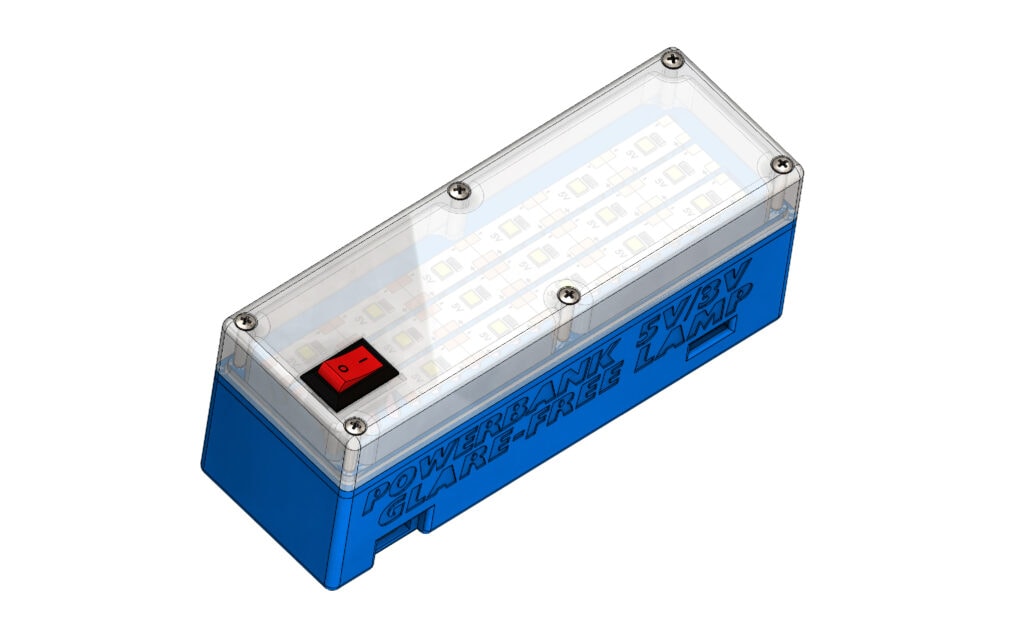
For the top side (the lid, where the light shines through) it became a little more complex. On the one hand, enough light should shine through, but on the other hand, it must not dazzle! Of course, a crystal clear lid would be ideal for the light yield, but as I said, then it would possibly dazzle. To strike a balance between effective light output and freedom from glare, several factors must be taken into account:
- Material selection (filament)
- Distance to the light source
- Thickness of the lens
- Printing strategy

The choice of material for the anti-glare lamp was “ivory”. The distance to the illuminant is 10.5 mm and the layer thickness (material thickness) is 1 mm. The layer height is 0.25 mm, i.e. one millimeter results in four layers, with the first layer applied 45° to the left and the second layer 45° to the right. Due to the different directions of the layers, the light is refracted again and again and becomes glare-free. This is a subjective perception and the designation glare-free therefore does not apply to all people.
Assembly
-
Soldering the parts to the jumper cables:

-
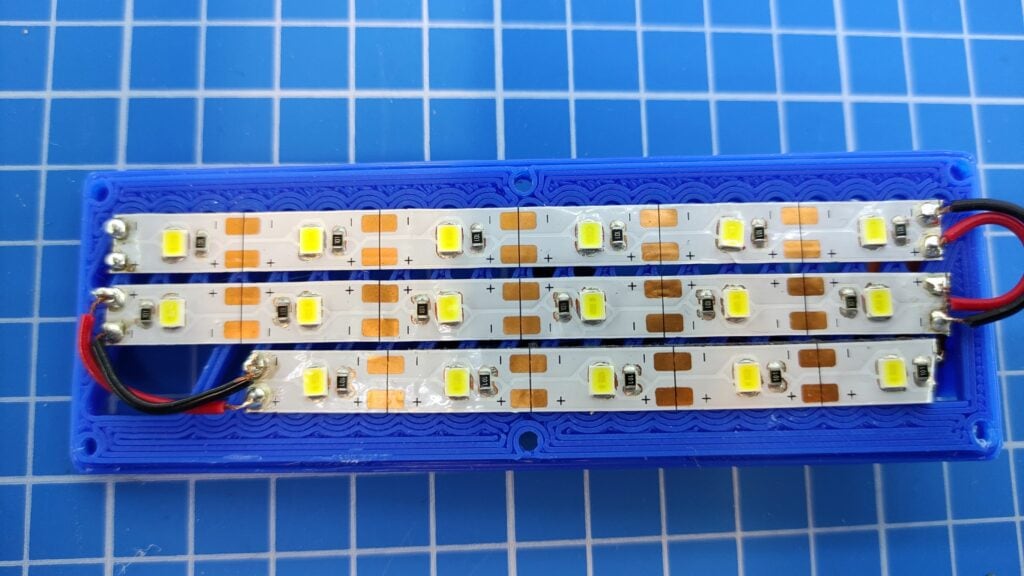
Cutting and gluing the LED strips: The LED strip is separated into two times 6 LEDs and once 5 LEDs and glued to the intermediate cover. The cable opening on the lid for the plug must remain free:
-
Attach the hollow bushing to the intermediate cover:
-
Screw the battery shield into the housing after the ten threads have been previously cut into the housing.
-
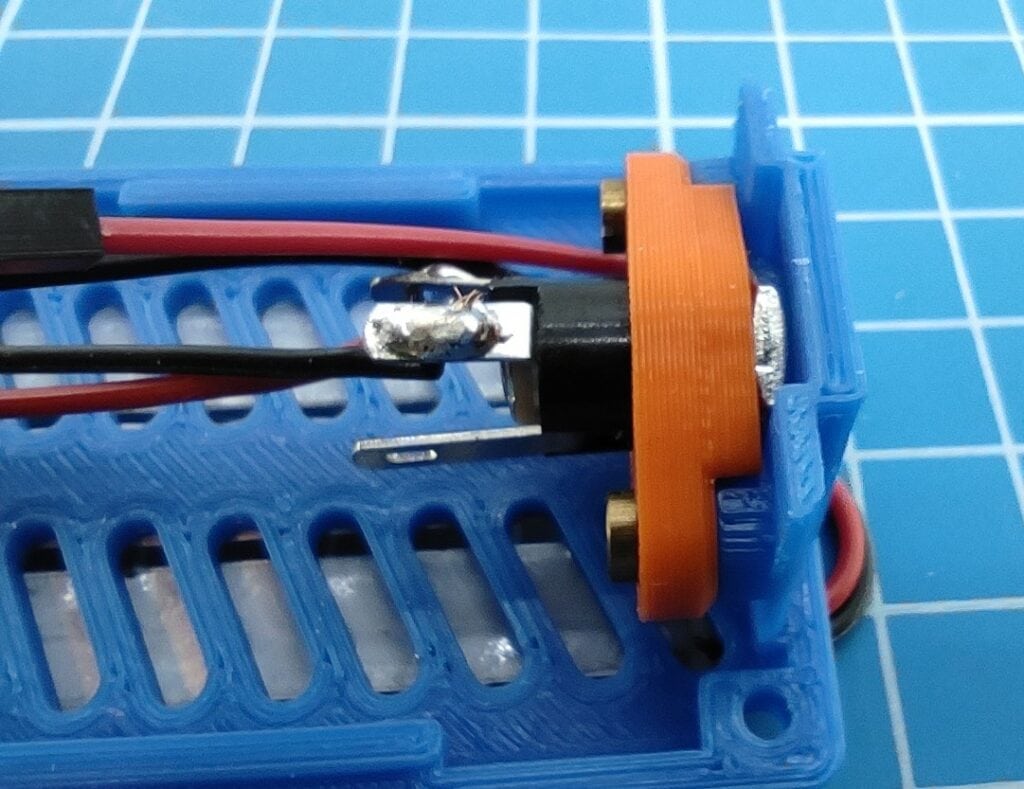
Press the rocker switch into the cover:

-
Press LiPo 18650 into the receptacle
-
Connect cable and turn on:
-
If all LEDs light up, place the middle cover on the housing and then place the cover on the middle cover and screw it down:


Glare free lamp CAD design

For the threads, the holes are designed for core hole diameter, i.e. for M2 for diameter 1.6 mm. You can tap the thread with the tap or form (press in) with a screw. Personally, I prefer the thread cutting. The two graphics show where the threads have to be cut on the housing.

Further notes
Some may wonder why the rocker switch sticks out of the lid and is not recessed. It makes it easier to turn the lamp on and off. Most of the time you only have one hand free and can’t really reach into the recess, but if the rocker switch sticks out it’s easier to operate it. Nevertheless, I have also designed a version with recessed rocker switch, which you can download in the download section!
The power of the lamp is about 1.4 watts. At 5.05 V the current is therefore 0.27 A, which is no problem for the Battery Shield V3 and the LiPo. The burn time of the lamp is about 5 hours in continuous operation. For this data, I used a Samsung 18650 with 3500 mAh. The powerbank can be used in parallel to run the lamp. However, the total current should not exceed 3A.

I use this lamp not only for my 3D printer, but also for soldering, reading or as a night light. The powerbank is also extremely light with 127g.